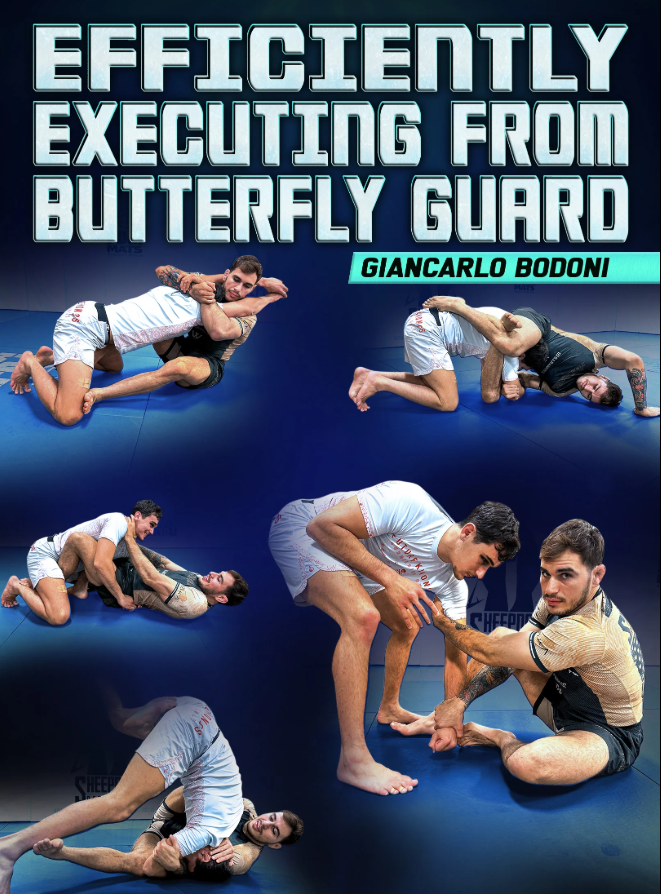
Master The Art Of The Butterfly Guard From ADCC Gold Medalist And Black Belt Giancarlo Bodoni, Gain Access To Elite-Level Techniques Proven Effective In The World’s Toughest Competitions.
Unlock the secrets of sweeping and controlling opponents with precision and finesse as Giancarlo Bodoni shares his championship-winning strategies for the butterfly guard, tailored for practitioners of all levels.
Elevate your Jiu-Jitsu game with expert guidance from Giancarlo Bodoni, who distills years of experience and success into a comprehensive curriculum designed to maximize your effectiveness from the butterfly guard.
Gain a competitive edge by learning the nuances of butterfly guard attacks, setups, and defenses directly from a renowned champion, empowering you to dictate the pace of the match and dominate your opponents.
Transform your grappling game with Giancarlo Bodoni’s unique insights and proven techniques, honed through countless hours of training and competition at the highest levels, ensuring that you emerge as a formidable force on the mat.
Volume 01
CHAPTER TITLE
START TIME
Intro
0:00 – 1:12
General Overview
1:12 – 3:44
Creating Pressure From Guard – Attacking In Multiple Directions
3:44 – 7:40
Push Pull Dynamic
7:40 – 11:14
Discrepancy Of Offensive Movements
11:14 – 18:07
The Rule Of Shoulders And Hips
18:07 – 22:12
Common Problems Associated With Butterfly Guard Vs Kneeling Opponent – Shutting Down A Body Locker
22:12 – 32:18
Double Throat Post
32:18 – 38:18
Chin Post
38:18 – 43:29
Recovering From Supine Butterfly
43:29 +
Volume 02
CHAPTER TITLE
START TIME
Sumi Gaeshi – Intro To Sumi Gaeshi
0:00 – 4:05
Directionality For Sumi Gaeshi
4:05 – 9:54
Sumi Gaeshi Mechanics
9:54 – 20:36
Collar And Elbow
20:36 – 25:44
Underhook
25:44 – 31:00
Overhook
31:00 – 37:10
Inside Ties
37:10 – 39:29
Armdrag
39:29 – 42:38
Shoulder Crunch
42:38 – 50:46
Sumi Gaeshi Hip Scoot
50:46 – 53:55
Sumi Gaeshi With Foot Assist
53:55 – 55:46
Sumi Gaeshi Into Cross Ashi
55:46 – 1:02:16
Hand Assist
1:02:16 – 1:04:09
Opponent Runs
1:04:09 – 1:12:06
Opponent Back Steps
1:12:06 +
Volume 03
CHAPTER TITLE
START TIME
Hip Heisting – The Importance Of Hip Heisting
0:00 – 3:46
Basic Heist And Snapdown
3:46 – 10:38
Synergy Between Hip Heisting And Sumi Gaeshi
10:38 – 14:58
Sumi Gaeshi To Hip Heist
14:58 – 18:11
Arm Drag To Sumi to Go Behind/Heist
18:11 – 20:54
Using Ashi Waza To Break Stance
20:54 – 24:52
Double Kouchi When They Stand
24:52 – 27:59
Seated To Snap Guillotine
27:59 – 34:32
Seated Snap To Heist
34:32 – 37:37
Opponent Defends Guillotine – Hip Heist
37:37 +
Volume 04
CHAPTER TITLE
START TIME
Arm Drag – Intro To Arm Drag
0:00 – 2:19
Push Drag
2:19 – 7:25
Rising Arm Drag
7:25 – 11:10
Using Arm Drag To Set Up Hip Heist
11:10 – 15:27
Ashi Garami Off Posted Leg
15:27 – 17:14
Elbow To Belly Button – Sumi Gaeshi
17:14 – 22:22
Hiza Guruma When They Stand
22:22 – 23:57
Taking The Back
23:57 – 29:53
Entering The Legs When They Stand
29:53 – 33:11
Arm Drag Sumi Gaeshi Series
33:11 – 38:03
Arm Drag Sumi Gaeshi To X Guard
38:03 +
Volume 05
CHAPTER TITLE
START TIME
Pulling Into Upper Body Submissions – Pulling Armbar Vs Kneeling
0:00 – 2:59
Te Gatame Vs Kneeling
2:59 – 8:02
Pulling To Clamp
8:02 – 11:53
Entering Triangle Vs Kneeling
11:53 – 17:49
Elevating A Kneeling Opponent – 2 On 1 To Standard Ashi
17:49 – 21:55
2 On 1 To Elbow To The Back
21:55 – 25:36
Double Tricep Into Standard Ashi
25:36 – 29:09
Pinch Headlock – Slide By
29:09 – 33:29
Ude Gatame
33:29 – 38:24
Shoulder Crunch Hiza Guruma
38:24 – 41:34
Shoulder Crunch Triangle
41:34 – 43:42
Shoulder Crunch Ashi Garami
43:42 – 45:43
Following Up When Losing The Arm
45:43 – 51:41
Getting Into High Lock
51:41 – 54:10
High Lock Reversals – Seated/Supine
54:10 – 58:53
High Lock Shrug
58:53 – 1:01:11
Low Lock Forward Shift Standup
1:01:11 – 1:03:37
Entering Ashi Garami – When 1 Knee Up
1:03:37 +
Volume 06
CHAPTER TITLE
START TIME
Versus Standing – Seated Guard Vs Standing
0:00 – 6:11
Rule Of The Toe And Heel
6:11 – 10:21
Creating A Push Pull Dynamic
10:21 – 14:23
Double Kouchi Vs Square
14:23 – 20:31
Double Kouchi Vs Staggered
20:31 – 25:33
Sitting Guard To Double Kouchi
25:33 – 28:37
Sumi Gaeshi Vs Standing
28:37 +
Volume 07
CHAPTER TITLE
START TIME
Gripping Strategies – Grip Options
0:00 – 5:22
Strategy 1
5:22 – 7:33
Strategy 2
7:33 – 10:36
Strategy 3
10:36 – 12:50
Strategy 4
12:50 – 17:16
Shin To Shin – Opponent Steps Out Of Kouchi
17:16 – 20:03
Block The Lead Leg Then Insert Foot
20:03 – 22:54
Scoot Back Then Close Gap
22:54 – 25:11
Circular Shot
25:11 – 27:52
Near Side 2 On 1
27:52 – 29:55
Double Kouchi From Shin To Shin
29:55 – 32:57
Entering Standard Ashi Near Leg
32:57 – 36:14
Entering Cross Ashi Far Leg
36:14 +
Volume 08
CHAPTER TITLE
START TIME
Ashi Waza – Defining Success
0:00 – 6:05
Foot Block
6:05 – 12:39
Inside Foot Block
12:39 – 15:25
De Ashi
15:25 – 23:15
Baiting De Ashi
23:15 – 27:41
Double Kouchi To Hip Heist
27:41 – 30:00
Double Kouchi To Ashi Garami
30:00 – 31:40
Ashi Waza Drill
31:40 – 41:26
Rolling Into Legs – Inside Reach To Backside 50/50
41:26 – 45:26
Scoop Grip To Cross Ashi
45:26 – 48:01
Getting Underneath The Hips – 2 on 1 To Double Shin
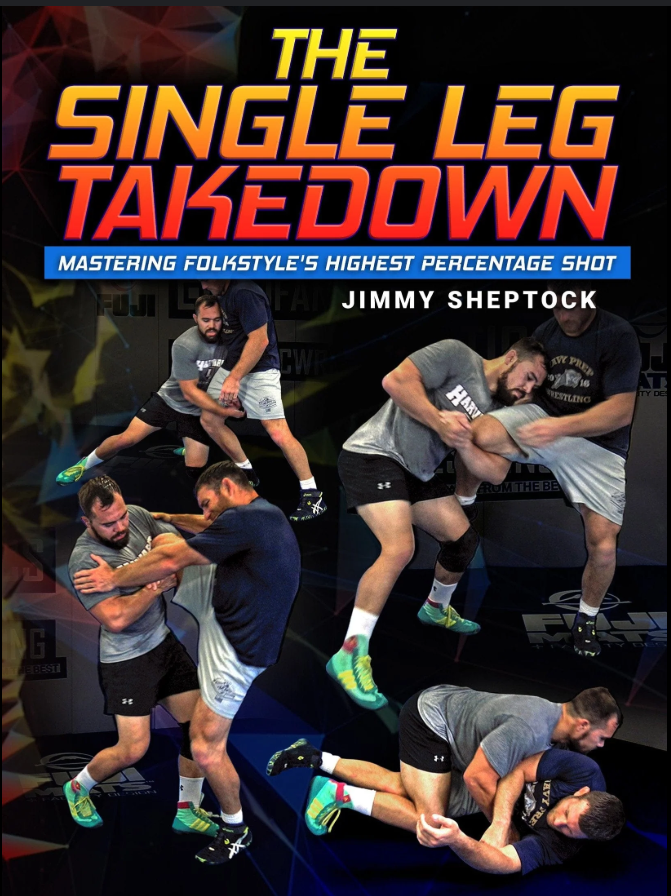
Learn The Most Effective Shot In Wrestling: It Works Against Any Defense Or Counter If Employed Correctly
NCAA All-American, National Finalist, and current D1 head coach Jimmy Sheptock shows the technique and strategies around shooting and scoring the single leg
With these systems around scoring with leg attacks, you can increase your attack rate, finishing rate, and winning record.
Overcome the biggest problems and modern defenses with Jimmy’s solutions to finishing every time you get to the leg.
More high level matches are decided with single legs than any other takedown!
See the secret details behind what makes for the best single leg shots.
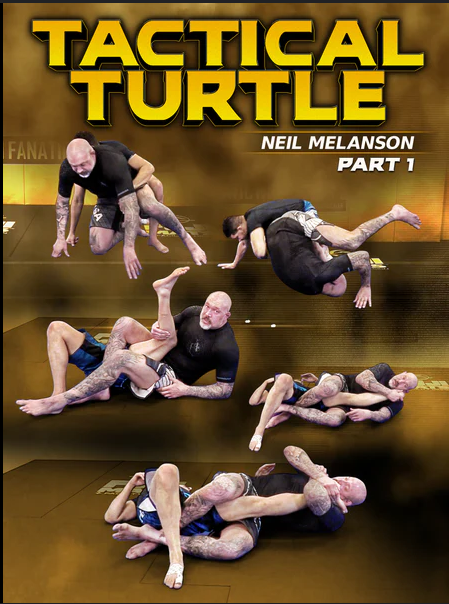
Neil Melanson is back with BJJ Fanatics to show his entire system for staying safe and generating real grappling offense from the turtle position
Neil Melanson is one of the best grappling coaches in the world, with a rare mix of Brazilian jiu-jitsu, catch wrestling, MMA ground game, and other grappling disciplines.
Learn all of the inside secrets behind this key to Neil’s catch wrestling system – and how grapplers of all levels can use them for rapid improvement on the mats.
Use the turtle position to stay safe and make this potentially dangerous defense into a bulletproof strength with these simple adjustments.
See how wrestling reversals can get you back on top and into dominant position, including ankle picks, single legs, rolls, peek outs, and more
Lock up submissions that can finish the fight, including Neil’s devastating double wrist lock kimura series.
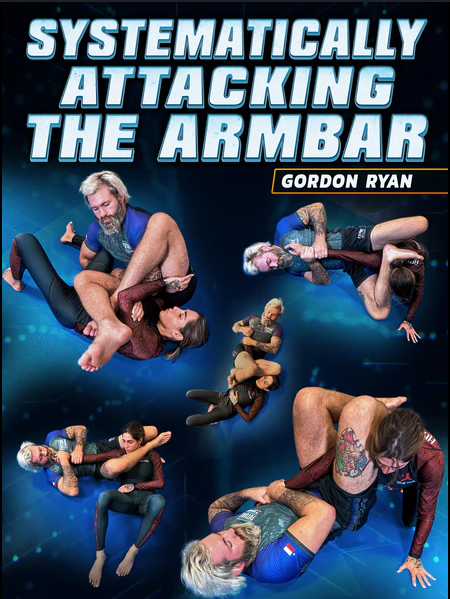
Revolutionize Your Ability To Attack and Finish With The Most Effective Armbar Variations Under The Guidance Of Grappling GOAT Gordon Ryan!
Gordon Ryan teaches you to systematically attack the armbar in his masterclass 8-part instructional spanning 7+ hours of content, coupled together with rolling footage and commentary!
Get a complete introduction to armbars, also known as Juji Gatame, including differences between top Juji vs bottom Juji, types of grips, Juji variations, escape options for your opponent, and more!
Shift your mindset when attacking armbars with Gordon Ryan’s championship level tactics that allow you to gain a systematic understanding of attacking the armbar and its most effective variations.
Learn Juji variations like quarter Juji, full Juji, three quarter Juji, Pillow/Scissor Juji, as well as complimentary attacks that present themselves during the Juji process.
Discover one of Gordon’s favorite Juji variations, the Shoulder Sankaku, and how it can be an integral part of your Juji game for both bottom and top positions!
Troubleshoot common escape tactics and how to blend between Juji variations to always have a path to finish.
Volume 1
CHAPTER TITLE
START TIME
Intro To Armbars
0:00 – 1:13
Top Juji Vs Bottom Juji
1:13 – 2:45
Central Problems
2:45 – 5:05
Types Of Juji’s
5:05 – 9:50
Types Of Grips
9:50 – 11:54
Top Hand Vs Bottom Hand Post
11:54 – 15:19
3 Escaping Directions
15:19 – 18:16
Dilemma Game
18:16 – 19:56
Overview
19:56 +
Volume 2
CHAPTER TITLE
START TIME
Quarter Juji – Intro To Quarter Juji
0:00 – 1:25
Ways To Escape
1:25 – 2:39
Top Hand Vs Bottom Hand Post Theory
2:39 – 6:26
Initial Stabilization
6:26 – 10:46
Long End Of The Lever
10:46 – 11:59
Elbow To Hip Rule
11:59 – 14:27
Falling Towards The Legs – Kipping Hands Apart
14:27 – 18:58
Proper Gripping
18:58 – 22:54
Finishing Mechanics
22:54 – 28:41
Peeling Thumbs
28:41 – 31:52
Ten Finger Grip Break
31:52 – 36:59
Palm To Palm Grip Break
36:59 – 41:55
Wrist To Wrist Grip Break
41:55 – 44:05
Countering A Hamstring Grab
44:05 – 45:44
Falling Towards The Head Separating Ten Finger Grips
45:44 – 50:44
Separating Palm To Palm Grips
50:44 – 54:45
Separating Wrist To Wrist Grips
54:45 +
Volume 3
CHAPTER TITLE
START TIME
Lat Juji
0:00 – 3:23
Using Kimura To Stop A Roll
3:23 – 6:30
Countering A Hitchhiker Escape
6:30 – 10:10
Countering A Back Roll
10:10 – 14:00
Switching To Other Systems
14:00 – 18:43
Roll Them Through
18:43 – 25:07
Entering Legs
25:07 – 26:51
Opponent Stacks – Knee And Ear Rule
26:51 – 28:49
Separating Hands
28:49 – 38:09
Lat Juji
38:09 – 40:49
Returning Opponent To The Mat
40:49 – 45:34
Returning Standing Opponent To The Mat
45:34 – 49:23
Enter Legs
49:23 – 53:05
Addressing A Figure 4/ Moving To Full Juji
53:05 +
Volume 4
CHAPTER TITLE
START TIME
Intro To Full Juji
0:00 – 1:28
Ways To Escape
1:28 – 2:57
Top Hand Vs Bottom Hand Post
2:57 – 5:29
Initial Stabilization
5:29 – 7:52
Falling Towards The Legs Grip Breaks
7:52 – 8:43
Falling Towards The Head Grip Breaks
8:43 – 10:27
Far Shoulder Trap
10:27 – 16:51
Countering Hitchhiker
16:51 – 21:33
Countering Backroll
21:33 – 23:30
Switching To Other Systems
23:30 – 28:29
Rolling Through
28:29 – 29:56
Countering An Ankle Elbow Wedge
29:56 – 38:27
Stacking Differences
38:27 – 46:33
Addressing A Figure Four-Thumb Posting The Wrist
46:33 – 52:18
Over Wrapping The Leg
52:18 – 59:30
Figure Four Top Lock
59:30 – 1:03:04
Armpit Wedge
1:03:04 – 1:06:49
Countering An Inside Knee
1:06:49 – 1:09:15
Moving To Mount
1:09:15 – 1:16:37
Entering The Legs
1:16:37 – 1:18:13
Moving To Three Quarter Juji – Over The Knuckles Under The Arms
1:18:13 +
Volume 5
CHAPTER TITLE
START TIME
Intro To Three Quarter Juji
0:00 – 3:04
Ways To Escape
3:04 – 5:57
Top Hand Vs Bottom Hand Post
5:57 – 7:15
Initial Stabilization
7:15 – 8:50
Dilemma Game
8:50 – 10:21
Falling Towards The Leg Grip Breaks
10:21 – 13:29
Triangle Dilemma
13:29 – 16:06
Falling Towards The Head Grip Breaks
16:06 – 20:30
Countering Hitchhiker
20:30 – 22:25
Countering A Backroll
22:25 – 23:12
Switching To Other Systems
23:12 – 26:57
Rolling Through
26:57 – 29:24
Stacking Differences
29:24 – 33:47
Returning Standing Opponent To The Mat/Enter The Legs
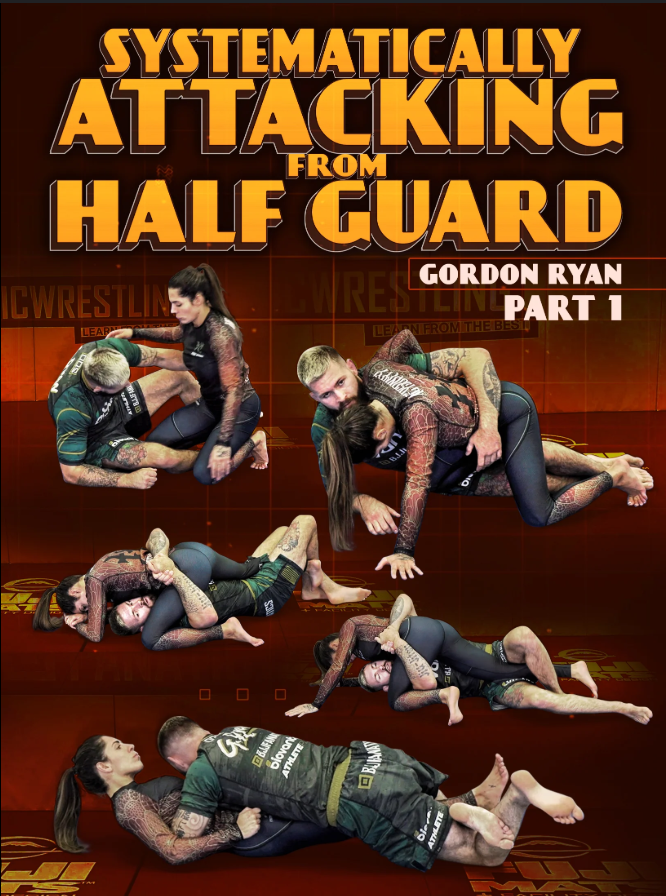
Master The No-Gi Half Guard And Attack Systematically With Moves Anyone Can Use For Rapid Skill Development From The Best No-Gi Grappler On Earth, Gordon “The King” Ryan
Use this never-before-shown half guard system of Gordon “The King” Ryan, with sweeps, back takes, and leg lock entries that he has perfected for no-gi grappling
Use knee shields, half butterfly guard, deep half, scorpions, and more as Gordon takes you through the half guard configurations that work best for him
Gordon shows every detail of this system, breaking down goals, techniques, combinations, and strategies for faster development and more success from your back
Pummel and grip for no-gi with underhooks, cross shoulder posts, pinch headlocks, shoulder crunches, and more, with techniques broken down so grapplers of all ages and levels can use them
Gordon Ryan is the ADCC Absolute Champion and one of the best no-gi grapplers of all time, and the consensus best active no-gi grappler competing today
See Gordon rolling in the gym from half guard and then watch as he breaks down that footage in real-time to explain the system in action
Volume 1
CHAPTER TITLE
START TIME
Overview of the Half Guard Series
4:52 – 7:23
Advantages and Disadvantages to Butterfly Half Guard
7:23 – 11:36
Advantages and Disadvantages to (Low/High) Knee Shield
11:36 – 16:19
The General Battle for Inside Position
16:19 – 23:06
Denying Head Control
23:06 – 27:24
Framing Effectively
27:24 – 31:37
The Centerline Shift Dilemma
31:37 – 37:59
Moving From a Cross Shoulder Post to an Underhook
37:59 – 42:57
Basic Switch to Sumi Gaeshi
42:57 – 50:18
Entering the Near Leg Irimi Ashi
50:18 – 57:23
Importance of Switching Legs
57:23 – 1:04:49
Underhook to Far Leg Irimi Ashi
1:04:49 – 1:08:47
Underhook to Cross Ashi
1:08:47 – 1:15:31
Introduction to a Scoop Grip
1:15:31 – 1:20:07
Using a Scoop Grip to Enter X Guard
1:20:07 – 1:23:22
Using a Scoop to Enter Near Leg Cross Ashi
1:23:22 – 1:27:45
Using a Scoop to Spin to Far Leg Cross Ashi
1:27:45 +
Volume 2
CHAPTER TITLE
START TIME
Pinch Headlock to Shoulder Crunch
6:14 – 11:04
Pinch Headlock Entering the Legs
11:04 – 13:36
An Overhook Sumi Gaeshi
13:36 – 16:32
Failed Overhook Sumi Gaeshi Enter the Legs
16:32 – 23:33
A Special Gift
23:33 – 25:08
Stalling From a Butterfly Half Guard
25:08 – 32:07
Butterfly Half to Arm Drag
32:07 – 35:59
Failed Arm Drag To Knee Lever
35:59 – 43:51
Failed Knee Lever Switch to Sumi Gaeshi
43:51 – 51:56
Failed Knee Lever Re-drag
51:56 – 55:59
Failed Arm Drag Enter the Legs
55:59 – 59:39
Entering Kimuras From Butterfly Half Guard
59:39 – 1:03:20
Putting it Behind the Back
1:03:20 – 1:11:17
Counter to a Hip Switch
1:11:17 – 1:16:02
Separating the Hands
1:16:02 – 1:21:40
Failed Kimura Enter the Legs
1:21:40 – 1:27:33
Closing Out the Kimura Series (Butterfly Half)
1:27:33 +
Volume 3
CHAPTER TITLE
START TIME
Introduction to the Lower Leg Shift
6:36 – 16:08
Transitioning From Half Guard to a Lower Leg Shift
16:08 – 19:06
Basic Sweep From Lower Leg Shift
19:06 – 23:42
Failed Sweep Back Take
23:42 – 27:19
Coming Up From a Lower Leg Shift
27:19 – 31:31
Options From Underhook Versus Whizzer
31:31 – 34:40
Countering the Whizzer with the Roll
34:40 – 40:04
Partner Counters The Roll, Take the Back
40:04 – 43:53
Opponent Wins the Battle for Knee Position Enter Hiza Gatame
43:53 – 46:02
Countering a Backstep From a Lower Leg Shift
46:02 – 55:31
Reiterating Pinch Headlocks and Moving Back to a Butterfly Half
55:31 – 1:00:15
Opponent Gets an Underhook Switch Back to Butterfly Half
1:00:15 – 1:02:16
Opponent Gets Underhook Move to Triangle
1:02:16 – 1:10:53
Opponent Crushes Knees Together Re-guard With High Knee Shield
1:10:53 +
Volume 4
CHAPTER TITLE
START TIME
Key Differences Between Locking a Kimura (Butterfly Half) Versus a Knee Shield
6:57 – 16:20
Far Arm Drag
16:20 – 22:37
Opponent Counters Far Arm Drag with Darce, Enter Knee Lever
22:37 – 27:19
Partner Postures Out of Arm Drag Entering Far Leg Outside Ashi
27:19 – 33:24
Extreme Staller Pumping the Legs to Create Opportunity
33:24 +
Volume 5
CHAPTER TITLE
START TIME
Opponent Puts Far Knee Down Enter the Legs
8:21 – 14:39
Opponent Puts Near Knee Down, Force the Far Knee Down
14:39 – 16:47
Opponent Puts Near Knee Down, Enter the Near Leg
16:47 – 21:07
Near Knee Down Enter Ashi on the Far Leg
21:07 – 25:10
Opponent Puts Near Knee Down, Exit Through the Back
25:10 – 28:55
Failed Back Attack, Chase the Legs
28:55 – 32:25
Countering a Backstep
32:25 – 37:47
Sweeping an Opponent Who Steps Over the head
37:47 – 41:51
Entering Deep Half Guard From Outside Foot Position (Far Knee Down)
41:51 +
Volume 6
CHAPTER TITLE
START TIME
Heisting From a Scorpion
4:55 – 8:56
Using a Scorpion to Pass the Leg Across
8:56 – 13:46
Using a Scoop Grip to Sweep Backwards
13:46 – 18:10
Countering Opponent’s Underhook
18:10 – 24:39
Using an Overwrap to Sweep Forward
24:39 – 29:38
The Scorpion/Lower Leg Shift Dilemma
29:38 – 35:10
Locking a Scorpion When Opponent Puts Near Knee Down
35:10 – 37:28
Returning Opponent’s Far Leg to the Floor
37:28 – 41:14
Countering a Knee Slip with Hiza Gatame
41:14 – 46:23
Countering a Far Hip Knee Slip With an Inside Elbow
46:23 – 49:54
The Waiter Sweep Dilemma
49:54 – 59:17
Taking the Back When Opponent Steps Over the Head
59:17 – 1:08:56
Back Take/Sweep Dilemma
1:08:56 – 1:12:48
Pommeling a Leg Back Inside From Outside foot Position
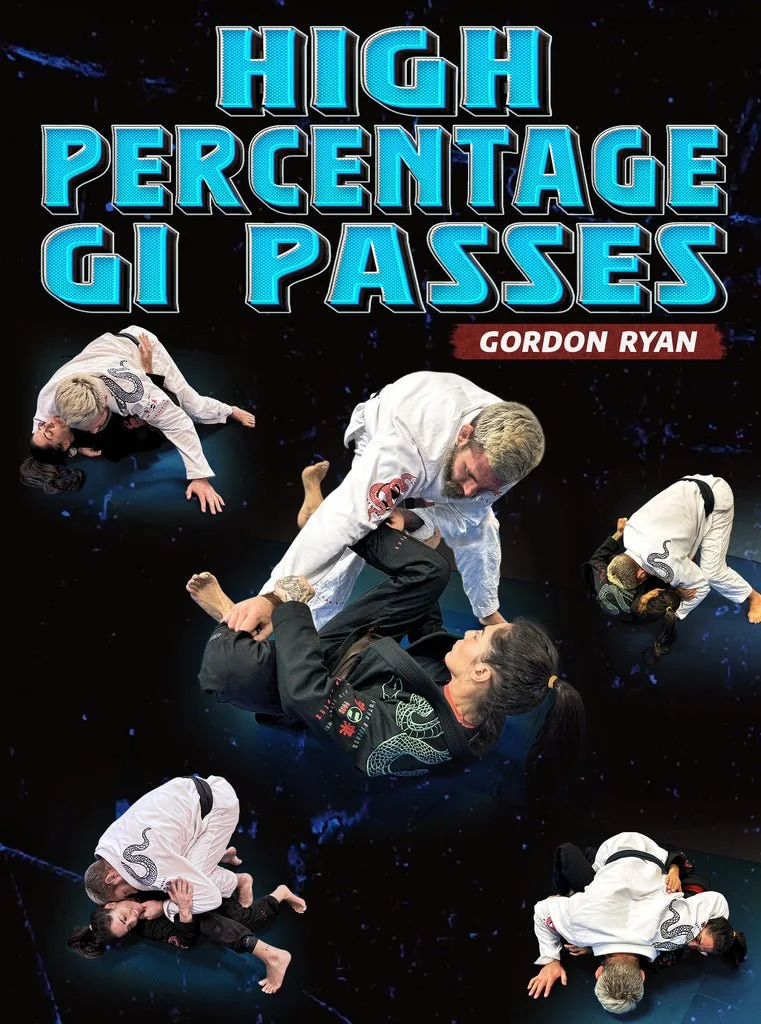
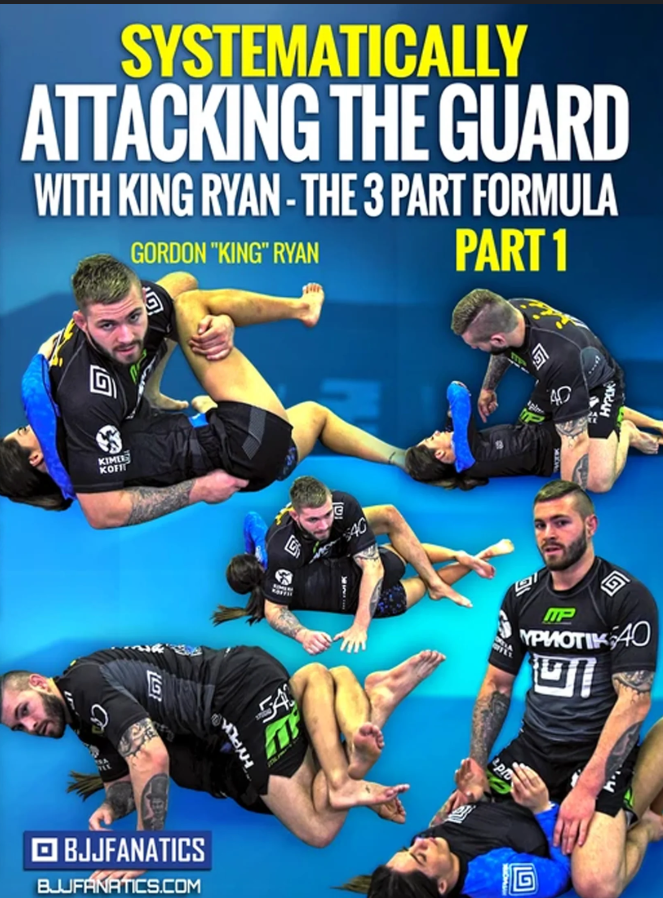
First Time Ever Revealed: The Three Part Passing System That No One Can Stop. Whether You Are Big Or Small, Old Or Young – Gordon Ryan’s Passing System Is A Cheat Code To Passing Any Style Of Guard
In Just 7 Years Of Training Gordon Has Become ADCC World Champion &IBJJF No Gi Double Gold Black Belt World Champion. His Secret: The Guy With The Most Knowledge Wins
If You’re Serious About Grappling – Don’t Miss This Once In A Lifetime Chance To Improve Faster Than You Ever Thought Possible
With over 10 hours of video, dive inside the mind of Gordon Ryan and see how he systematically picks apart the guard and passes the elite of the elite, including him breaking down actual footage of live sparring
Gordon Ryan has blazed a trail to the top, and after an ADCC championship and double gold at IBJJF No-Gi Worlds
Gordon approaches passing with the same laser-focused intensity and study as every other system in his game
Volume 1
CHAPTER TITLE
START TIME
Gordon Ryan Guard Passing Intro
0:00 – 5:35
Guard Passing overview
5:35 – 8:24
Opening Closed Guard
8:24 – 29:24
Opening The Rubber Guard
29:24 – 32:10
Establishing Inside Foot
32:10 – 37:00
Rolling Kimura On Seated Opponent
37:00 – 41:43
Dealing With Reverse De La Riva
41:43 – 55:33
Using Cross Ashi Garami to Shut Down Reverse deal riva
55:33 – 1:01:19
Dealing w Full Inversion From Reverse De La Riva
1:01:19 – 1:09:00
Passing With A Split Squat
1:09:00 – 1:15:58
Volume 2
CHAPTER TITLE
START TIME
Dealing w Lasso From split Squat
0:00 – 3:06
Back stepping off split squat
3:06 – 17:30
Back Step Off Split Squat 2
17:30 – 24:39
Back Step Off Split Squat Into Guillotine
24:39 – 31:38
Passing Low Knee Shield From Half Guard
31:38 – 45:23
Passing Low Knee Shield 2
45:23 – 1:00:07
Passing Low Knee Shield W Cross Shoulder Post
1:00:07 – 1:05:21
Passing High Knee Shield
1:05:21 – 1:14:51
Passing High Knee Shield 2
1:14:51 – 1:17:29
Passing High Knee Shield 3
1:17:29 – 1:22:06
Passing High Knee Shield 4 w Darce Strangle
1:22:06 – 1:29:21
Passing High Knee Shield 5
1:29:21 – 1:32:05
Passing High Knee Shield 6
1:32:05 – 1:34:44
Volume 3
CHAPTER TITLE
START TIME
Shutting Down Underhook From Half Guard
0:00 – 10:08
Body Lock Pass Off of Their Underhook
10:08 – 13:28
Under Over Passing
13:28 – 18:00
Under Over Passing 2
18:00 – 21:49
Knee Bar From Over Under Passing
21:49 – 25:24
Under Over Passing 3
25:24 – 29:17
Deep Half Guard Passing
29:17 – 50:41
Passing High Knee Shield 2 With Overwrap Leg
50:41 – 56:13
Defending Scorpion /”Lock Down”
56:13 – 1:00:45
Defending scorpion 2 when partner has Underhook
1:00:45 – 1:10:20
Volume 4
CHAPTER TITLE
START TIME
Half Butterfly Passing Using Split Squat
0:00 – 6:18
Half Butterfly Passing Using Split Squat 2
6:18 – 10:35
Half Butterfly Passing Using Split Squat 3
10:35 – 17:23
Half Butterfly Pass
17:23 – 30:47
Half Butterfly Pass 2
30:47 – 32:53
Half Butterfly Pass 3
32:53 – 36:22
Half Butterfly Pass 4 Off of Opponents Underhook
36:22 – 39:57
Half Butterfly Pass 5 Using Guillotine
39:57 – 43:40
Half Butterfly Pass 6 With Cross Shoulder Post
43:40 – 46:33
Half Butterfly Pass 7 With Cross Shoulder Post
46:33 – 57:03
Volume 5
CHAPTER TITLE
START TIME
Passing Off Inside Foot , Straight Hamstring/ Dealing w/ De La Riva
0:00 – 17:10
Passing Off Inside Foot , Straight Hamstring 2
17:10 – 21:01
Passing Off Inside Foot , Straight Hamstring 3
21:01 – 27:29
Passing Off Inside Foot , Straight Hamstring 4
27:29 – 31:41
Passing Off Inside Foot , Straight Hamstring 5 Knee on Top Hip
31:41 – 56:24
Using Side Body Lock on Seated Opponent
56:24 – 1:08:23
Using Side Body Lock on Seated Guard 2
1:08:23 – 1:10:55
Double Unders Body Lock Passing
1:10:55 – 1:20:34
Double Unders Body Lock Passing 2
1:20:34 – 1:22:22
Double Unders Body Lock Passing 3 Long Arm Short Arm / Tight Waist
1:22:22 – 1:28:54
Double Unders Body Lock Passing 4 Long Arm Short Arm / Tight Waist
1:28:54 – 1:34:56
Volume 6
CHAPTER TITLE
START TIME
Underhook Over hook BodyLock Passing
0:00 – 4:24
Underhook Overhook Body Lock Passing 2
4:24 – 7:07
Double Over Body Lock Passing
7:07 – 12:24
Passing Butterfly When Opponent Double Under Hooks
12:24 – 16:22
Getting Inside Foot when Opponent Has shin to shin Guards
16:22 – 19:30
Passing Standard Ashi Garami
19:30 – 26:18
Passing From X Guard
26:18 – 29:55
Passing From Ushiro XGuard
29:55 – 32:06
Passing Reverse X Guard
32:06 – 37:11
Passing Ushiro Reverse X Guard
37:11 – 42:31
Passing Outside Ashi Garami
42:31 – 47:12
Passing 50 / 50
47:12 – 57:15
Passing Cross Ashi Garami
57:15 – 1:00:27
Introduction Supine Guard
1:00:27 – 1:02:07
Using V Grips to Pass Supine Guard
1:02:07 – 1:06:17
Establishing Good Foot Position W Torreando Passing
Gordon Ryan teaches every detail behind his signature submission system, including the rear naked strangle that he has used to submit some of the best on Earth.
Watch Gordon break down gym footage to talk you through the techniques and system in real-time.
Learn the back attack system developed together by Gordon and his coach, Professor John Danaher, to create Gordon’s one-of-a-kind combos of strangles, arm locks, triangles, and more.
Gordon is fresh off of ADCC 2019, where he won double gold and strangled five elite black belts with these exact details.
Gordon Ryan has used this system nearly exclusively the last few years, including dozens of submission wins as a black belt.
Know More. Win More.
Course Content
Collapse All Sections
Volume 1
CHAPTER TITLE
START TIME
Introduction
0:00 – 3:47
Exploiting the Body’s Asymmetry Introduction
3:47 – 7:04
Control Mechanisms
7:04 – 9:51
Importance of Diagonal Control
9:51 – 13:34
Underhook Side vs Overhook Side
13:34 – 20:10
Goal Setting Offensively
20:10 – 25:38
Goal Settign OFfensively (Grip Fighting)
25:38 – 29:42
Goal Setting Defensively
29:42 – 36:13
Overview of Upper Body Grips
36:13 – 45:32
Introduction to Control On the Overhook Side
45:32 – 47:08
Recovering Bottom Hook (Long Hook)
47:08 – 53:34
Recovering Bottom Hook (Short Hook)
53:34 – 1:00:59
Countering a Complete Hip Escape
1:00:59 – 1:22:18
Volume 2
CHAPTER TITLE
START TIME
Utilizing Butterfly Hook When Oppoenent Clears Top Hook
0:00 – 3:42
Switching Off to High Ball Ride
3:42 – 7:55
Re-Inserting Hook From High Ball Ride
7:55 – 14:39
Overview of Escaping Head First on Over Hook Side
14:39 – 20:40
Understanding the InterfaceBetween Underhook and Over Hook Side
20:40 – 24:17
Countering a Two on One Escape with a Claw Grip
24:17 – 30:54
The Kata Gatame Back Exposure Dilemma
30:54 – 40:52
Countering a Two on One with a Half Claw
40:52 – 46:15
Countering a Full Elbow Slip
46:15 – 54:21
Using an Arm Drag to Counter a Full Escape
54:21 – 59:59
Understanding the Rear Chest Lock
59:59 – 1:02:36
Re-Capturing Head Position Through Claw Grip Variation
1:02:36 – 1:12:35
Volume 3
CHAPTER TITLE
START TIME
Intro to undertook side
0:00 – 2:47
Opponent clears bottom hook – re attacking with good head position
2:47 – 8:03
Reiterating the seated head and arm
8:03 – 14:23
Countering opponents elbow wedge
14:23 – 21:50
Introduction to opponent clearing top hooks
21:50 – 23:34
Using a butterfly hook to enter post rear mount
23:34 – 26:44
Understanding the differences between highball ride underhook vs overhook side
26:44 – 30:25
Using gripping strategies to counter opponents knee post
30:25 – 35:33
Countering successful knee post from highball ride
35:33 – 38:36
Countering when opponent successfully turtles
38:36 – 45:04
Volume 4
CHAPTER TITLE
START TIME
Introduction to escaping the under-hook side – upper body
0:00 – 2:25
Using far wrist to recover head positioning
2:25 – 11:15
Recovering head position when you loose the far wrist
11:15 – 20:31
Using a butterfly hook to reclaim head position
20:31 – 30:09
Recapturing the back via kimura
30:09 – 35:25
Understanding the value of cross body ride
35:25 – 39:53
Reclaiming the back from Cross body ride
39:53 – 48:33
Freestyle Guillotine from cross body ride
48:33 – 56:13
Hammerlock from cross body ride
56:13 – 1:01:01
Attacking the legs from a cross body ride
1:01:01 – 1:05:56
Volume 5
CHAPTER TITLE
START TIME
Explains offensive and defensive elbow pummeling
0:00 – 2:48
Extraction and reinsertion method to counter elbow pummel
2:48 – 5:45
Using a cross wrist to counter elbow pummels
5:45 – 8:58
What to do when opponent forces two strangle hands
8:58 – 12:29
Explaining the hip height problem/ theory of neck pummeling
12:29 – 18:07
Introduction to finishing from the back
18:07 – 21:37
Recapping under hook vs over-hook side
21:37 – 25:32
Straight wrist grips vs cross wrist grips
25:32 – 26:58
The dilemma between trapping the hands and attacking the neck
26:58 – 30:39
The inherent flaw of one on one grips
30:39 – 33:52
Proper head positioning while strangling
33:52 – 36:18
Multidirectional grip breaking
36:18 – 43:00
Ten finger grip break
43:00 – 45:34
How to properly lock a strangle
45:34 – 51:01
Using a finger walk to counter secondary hand interference
51:01 – 56:50
Countering secondary hand thumb line grab
56:50 – 1:00:53
Countering partners primary hand grab
1:00:53 – 1:03:36
Eliminating partners primary hand via leg trap
1:03:36 – 1:09:06
Two ways of trapping hands
1:09:06 – 1:13:37
Volume 6
CHAPTER TITLE
START TIME
Intro to attacking from the under-hook side
0:00 – 2:21
Using a single cross wrist grip to trap a hand
2:21 – 7:34
Single cross double cross dilemma
7:34 – 10:40
Strangle/double cross trilema
10:40 – 13:56
Using a inside wrist grip to trap a arm
13:56 – 16:49
Using a inside wrist grip to switch to a cross grip
16:49 – 19:44
Countering the secondary defensive hand with a opportunistic trap
Gordon Ryan won an ADCC title by way of guillotine and he is here to show you the guillotine like never before. Start understanding this famous choke as more than a submission but as a position from the greatest no gi grappler ever
The guillotine may be the most accessible and high percentage submission in no gi – And it is much more than a submission
Learn how to use the guillotine to sweep, submit, pass, pin and MORE
Until Now This System Was Only For Gordon and his team but Gordon is going to share every single detail throughout 8 volumes and include rolling commentary where he goes over his EXACT train of thought
Gordon is not only the greatest no gi grappler but a master of articulation – he breaks techniques down in an EASY to implement way
Know more win more
Volume 1
CHAPTER TITLE
START TIME
Intro
0:00 – 1:15
Overview
1:15 – 2:20
Chin To Chest
2:20 – 4:19
Defensive Hand Positions
4:19 – 7:07
Gripping
7:07 – 11:30
Hip To Hip Connection
11:30 – 13:12
Types Of Guillotines
13:12
What To Use And When
16:47 – (20:55)
Volume 2
CHAPTER TITLE
START TIME
Intro To Guillotine From Closed Guard
0:00 – 2:10
Failed Hip Bump To Guillotine
2:10 – 5:48
Finishing Low Elbow
5:48 – 10:02
Finishing High Elbow
10:02 – 15:22
Finishing High Wrist
15:22 – 19:17
Finishing Power Guillotine
19:17 – 21:10
Finishing Figure 4 Guillotine
21:10 – 22:24
Finishing Arm In Guillotine
22:24 – 26:15
Follow To Mount
26:15 – 31:44
Failed Guillotines To Triangle
31:44 – 34:30
Failed Guillotines/Pummeling Legs Inside
34:30
Sumi Gaeshi
38:25 – (42:04)
Volume 3
CHAPTER TITLE
START TIME
Intro To Guillotine From Open Guard Bottom
0:00 – 1:28
Shoulder And Hip Rule
1:28 – 3:07
Footballing The Head
3:07 – 5:16
Sumi Gaeshi To Guillotine
5:16 – 7:00
Cross Shin/Closed Guard/Half Guard Scenarios
7:00 – 12:57
Following Defensive Roll
12:57 – 16:15
Following Defensive Rolls Vs Lower Body Disconnection
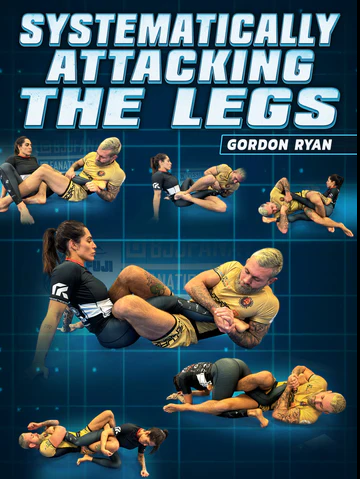
Now is your chance to unlock the secrets to heel hook success, as Gordon “The King” Ryan shows you how anyone can become a leg locker with these systems and techniques he has been using through his unparalleled rise in submission grappling
Gordon “The King” Ryan Reveals The Leg Locking Secrets That He Broke Onto The Scene And Continues To Dominate With, As He Teaches You How Anyone Can Systematically Attack The Lower Body In This 8-Volume Masterclass
Learn how to attack and defend in leg entanglements like irimi ashi garami, cross ashi, 50/50, outside ashi, and more!
In each position, Gordon breaks down exactly what you need to do, step-by-step, for success in staying safe as you apply seriously powerful submission holds
Understand the best ways to apply and break with inside and outside heel hooks, and why you must have both to become a complete leg locker
See actual rolling footage from the gym as Gordon puts this system into action and then breaks down exactly what he was doing so you can see the techniques in motion
Know more. Win more.
Volume 1
CHAPTER TITLE
START TIME
Intro To Leg Locks
0:00 – 3:41
Overview
3:41 – 6:41
Theory
6:41 – 8:37
Importance Of Inside And Outside Heelhooks
8:37 – 11:25
Battle Of Inside Positions
11:25 – 15:05
Irimi And Outside Ashi Garami Strategy
15:05 – 19:32
Cross And Inside Ashi Garami Strategy
19:32 – 24:20
50/50 Strategy
24:20 – 27:54
Mutual Ashi Garami Strategy
27:54 – 29:53
General Escape Directions
29:53 – 34:39
Double Trouble
34:39 – 37:32
Following A Leg
37:32 – 39:24
Switching Legs
39:24 – 41:22
Basic Drills
41:22 – 50:58
Achilles Lock Drill
50:58 – 54:50
Cowboy Drill
54:50 – 58:07
Achilles Lock Concepts
58:07 – 1:02:37
Knee Bar Concepts
1:02:37 – 1:07:34
Toe Hold Concepts
1:07:34 – 1:11:17
Heel Hook Concepts
1:11:17 +
Volume 2
CHAPTER TITLE
START TIME
Intro To Irimi Ashi Garami
0:00 – 1:53
Setting An Irimi Ashi Garami
1:53 – 5:21
Stress Test
5:21 – 10:28
Basic Achilles Lock
10:28 – 14:18
Countering A Basic Extraction
14:18 – 16:48
Countering Forward Pressure With Ashi Garami And Elbow Position
16:48 – 19:18
Countering Forward Pressure With Post Ashi
19:18 – 22:05
Countering Forward Pressure With Belly Down Achilles
22:05 – 25:27
Switching To Butterfly Ashi
25:27 – 29:36
Butterfly Ashi To Other Leg Entanglements
29:36 – 34:49
Achilles Heel Hook Dillemma
34:49 – 38:22
Finishing Mechanics
38:22 – 45:32
Stress Test
45:32 – 46:54
Countering A Heel Slip With High Hands
46:54 – 48:28
Countering A Heel Slip With A Roll Through
48:28 – 52:34
Switching To Outside Ashi
52:34 – 54:34
Single Roll Theory
54:34 – 59:41
Countering A Post Knee
59:41 – 1:02:22
Figure 4 Switch If They Refuse To Roll
1:02:22 – 1:05:13
Breaking Mechanics
1:05:13 – 1:07:52
Outside Ashi Breaking Mechanics
1:07:52 +
Volume 3
CHAPTER TITLE
START TIME
Intro To Outside Ashi
0:00 – 0:56
Irimi Ashi Garami Vs Outside Ashi Garami
0:56 – 5:04
Countering A High Leg
5:04 – 8:07
Countering A High Leg With Wrist To Wrist Toe Hold
8:07 – 10:28
Controlling Outside Ashi And Denying Back Exposure