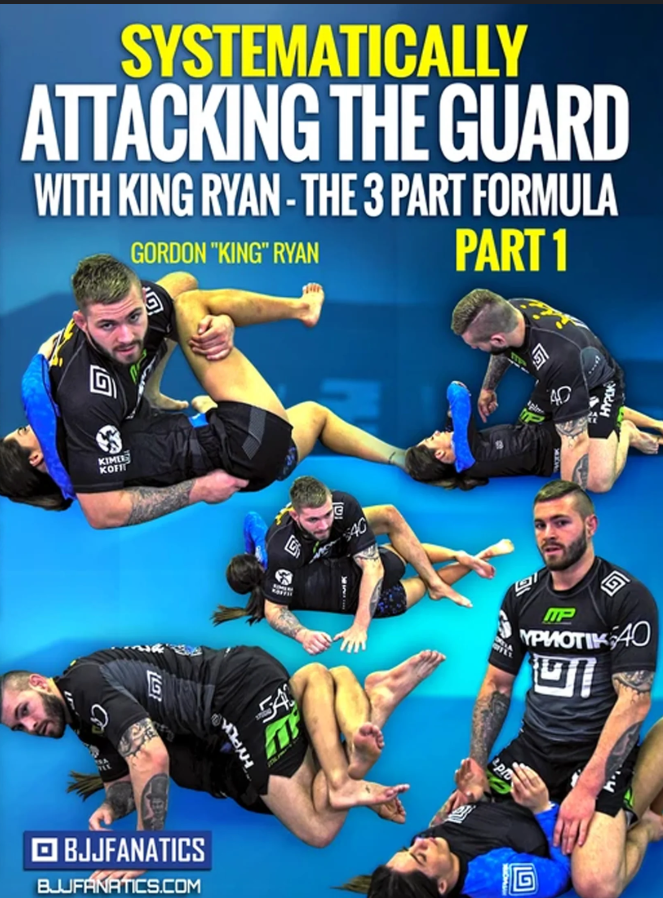
First Time Ever Revealed: The Three Part Passing System That No One Can Stop. Whether You Are Big Or Small, Old Or Young – Gordon Ryan’s Passing System Is A Cheat Code To Passing Any Style Of Guard
In Just 7 Years Of Training Gordon Has Become ADCC World Champion &IBJJF No Gi Double Gold Black Belt World Champion. His Secret: The Guy With The Most Knowledge Wins
If You’re Serious About Grappling – Don’t Miss This Once In A Lifetime Chance To Improve Faster Than You Ever Thought Possible
With over 10 hours of video, dive inside the mind of Gordon Ryan and see how he systematically picks apart the guard and passes the elite of the elite, including him breaking down actual footage of live sparring
Gordon Ryan has blazed a trail to the top, and after an ADCC championship and double gold at IBJJF No-Gi Worlds
Gordon approaches passing with the same laser-focused intensity and study as every other system in his game
Volume 1
CHAPTER TITLE
START TIME
Gordon Ryan Guard Passing Intro
0:00 – 5:35
Guard Passing overview
5:35 – 8:24
Opening Closed Guard
8:24 – 29:24
Opening The Rubber Guard
29:24 – 32:10
Establishing Inside Foot
32:10 – 37:00
Rolling Kimura On Seated Opponent
37:00 – 41:43
Dealing With Reverse De La Riva
41:43 – 55:33
Using Cross Ashi Garami to Shut Down Reverse deal riva
55:33 – 1:01:19
Dealing w Full Inversion From Reverse De La Riva
1:01:19 – 1:09:00
Passing With A Split Squat
1:09:00 – 1:15:58
Volume 2
CHAPTER TITLE
START TIME
Dealing w Lasso From split Squat
0:00 – 3:06
Back stepping off split squat
3:06 – 17:30
Back Step Off Split Squat 2
17:30 – 24:39
Back Step Off Split Squat Into Guillotine
24:39 – 31:38
Passing Low Knee Shield From Half Guard
31:38 – 45:23
Passing Low Knee Shield 2
45:23 – 1:00:07
Passing Low Knee Shield W Cross Shoulder Post
1:00:07 – 1:05:21
Passing High Knee Shield
1:05:21 – 1:14:51
Passing High Knee Shield 2
1:14:51 – 1:17:29
Passing High Knee Shield 3
1:17:29 – 1:22:06
Passing High Knee Shield 4 w Darce Strangle
1:22:06 – 1:29:21
Passing High Knee Shield 5
1:29:21 – 1:32:05
Passing High Knee Shield 6
1:32:05 – 1:34:44
Volume 3
CHAPTER TITLE
START TIME
Shutting Down Underhook From Half Guard
0:00 – 10:08
Body Lock Pass Off of Their Underhook
10:08 – 13:28
Under Over Passing
13:28 – 18:00
Under Over Passing 2
18:00 – 21:49
Knee Bar From Over Under Passing
21:49 – 25:24
Under Over Passing 3
25:24 – 29:17
Deep Half Guard Passing
29:17 – 50:41
Passing High Knee Shield 2 With Overwrap Leg
50:41 – 56:13
Defending Scorpion /”Lock Down”
56:13 – 1:00:45
Defending scorpion 2 when partner has Underhook
1:00:45 – 1:10:20
Volume 4
CHAPTER TITLE
START TIME
Half Butterfly Passing Using Split Squat
0:00 – 6:18
Half Butterfly Passing Using Split Squat 2
6:18 – 10:35
Half Butterfly Passing Using Split Squat 3
10:35 – 17:23
Half Butterfly Pass
17:23 – 30:47
Half Butterfly Pass 2
30:47 – 32:53
Half Butterfly Pass 3
32:53 – 36:22
Half Butterfly Pass 4 Off of Opponents Underhook
36:22 – 39:57
Half Butterfly Pass 5 Using Guillotine
39:57 – 43:40
Half Butterfly Pass 6 With Cross Shoulder Post
43:40 – 46:33
Half Butterfly Pass 7 With Cross Shoulder Post
46:33 – 57:03
Volume 5
CHAPTER TITLE
START TIME
Passing Off Inside Foot , Straight Hamstring/ Dealing w/ De La Riva
0:00 – 17:10
Passing Off Inside Foot , Straight Hamstring 2
17:10 – 21:01
Passing Off Inside Foot , Straight Hamstring 3
21:01 – 27:29
Passing Off Inside Foot , Straight Hamstring 4
27:29 – 31:41
Passing Off Inside Foot , Straight Hamstring 5 Knee on Top Hip
31:41 – 56:24
Using Side Body Lock on Seated Opponent
56:24 – 1:08:23
Using Side Body Lock on Seated Guard 2
1:08:23 – 1:10:55
Double Unders Body Lock Passing
1:10:55 – 1:20:34
Double Unders Body Lock Passing 2
1:20:34 – 1:22:22
Double Unders Body Lock Passing 3 Long Arm Short Arm / Tight Waist
1:22:22 – 1:28:54
Double Unders Body Lock Passing 4 Long Arm Short Arm / Tight Waist
1:28:54 – 1:34:56
Volume 6
CHAPTER TITLE
START TIME
Underhook Over hook BodyLock Passing
0:00 – 4:24
Underhook Overhook Body Lock Passing 2
4:24 – 7:07
Double Over Body Lock Passing
7:07 – 12:24
Passing Butterfly When Opponent Double Under Hooks
12:24 – 16:22
Getting Inside Foot when Opponent Has shin to shin Guards
16:22 – 19:30
Passing Standard Ashi Garami
19:30 – 26:18
Passing From X Guard
26:18 – 29:55
Passing From Ushiro XGuard
29:55 – 32:06
Passing Reverse X Guard
32:06 – 37:11
Passing Ushiro Reverse X Guard
37:11 – 42:31
Passing Outside Ashi Garami
42:31 – 47:12
Passing 50 / 50
47:12 – 57:15
Passing Cross Ashi Garami
57:15 – 1:00:27
Introduction Supine Guard
1:00:27 – 1:02:07
Using V Grips to Pass Supine Guard
1:02:07 – 1:06:17
Establishing Good Foot Position W Torreando Passing
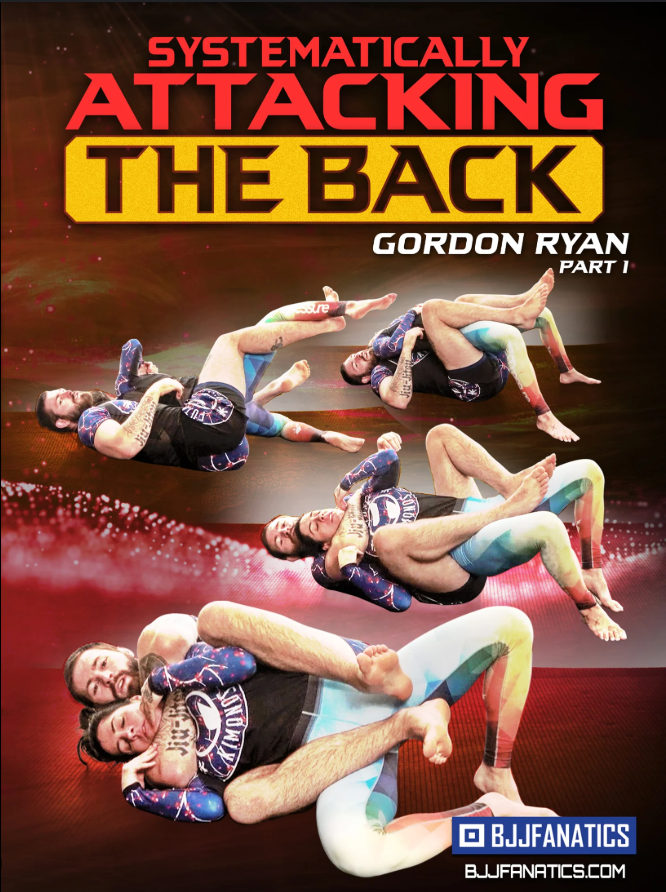
Gordon Ryan teaches every detail behind his signature submission system, including the rear naked strangle that he has used to submit some of the best on Earth.
Watch Gordon break down gym footage to talk you through the techniques and system in real-time.
Learn the back attack system developed together by Gordon and his coach, Professor John Danaher, to create Gordon’s one-of-a-kind combos of strangles, arm locks, triangles, and more.
Gordon is fresh off of ADCC 2019, where he won double gold and strangled five elite black belts with these exact details.
Gordon Ryan has used this system nearly exclusively the last few years, including dozens of submission wins as a black belt.
Know More. Win More.
Course Content
Collapse All Sections
Volume 1
CHAPTER TITLE
START TIME
Introduction
0:00 – 3:47
Exploiting the Body’s Asymmetry Introduction
3:47 – 7:04
Control Mechanisms
7:04 – 9:51
Importance of Diagonal Control
9:51 – 13:34
Underhook Side vs Overhook Side
13:34 – 20:10
Goal Setting Offensively
20:10 – 25:38
Goal Settign OFfensively (Grip Fighting)
25:38 – 29:42
Goal Setting Defensively
29:42 – 36:13
Overview of Upper Body Grips
36:13 – 45:32
Introduction to Control On the Overhook Side
45:32 – 47:08
Recovering Bottom Hook (Long Hook)
47:08 – 53:34
Recovering Bottom Hook (Short Hook)
53:34 – 1:00:59
Countering a Complete Hip Escape
1:00:59 – 1:22:18
Volume 2
CHAPTER TITLE
START TIME
Utilizing Butterfly Hook When Oppoenent Clears Top Hook
0:00 – 3:42
Switching Off to High Ball Ride
3:42 – 7:55
Re-Inserting Hook From High Ball Ride
7:55 – 14:39
Overview of Escaping Head First on Over Hook Side
14:39 – 20:40
Understanding the InterfaceBetween Underhook and Over Hook Side
20:40 – 24:17
Countering a Two on One Escape with a Claw Grip
24:17 – 30:54
The Kata Gatame Back Exposure Dilemma
30:54 – 40:52
Countering a Two on One with a Half Claw
40:52 – 46:15
Countering a Full Elbow Slip
46:15 – 54:21
Using an Arm Drag to Counter a Full Escape
54:21 – 59:59
Understanding the Rear Chest Lock
59:59 – 1:02:36
Re-Capturing Head Position Through Claw Grip Variation
1:02:36 – 1:12:35
Volume 3
CHAPTER TITLE
START TIME
Intro to undertook side
0:00 – 2:47
Opponent clears bottom hook – re attacking with good head position
2:47 – 8:03
Reiterating the seated head and arm
8:03 – 14:23
Countering opponents elbow wedge
14:23 – 21:50
Introduction to opponent clearing top hooks
21:50 – 23:34
Using a butterfly hook to enter post rear mount
23:34 – 26:44
Understanding the differences between highball ride underhook vs overhook side
26:44 – 30:25
Using gripping strategies to counter opponents knee post
30:25 – 35:33
Countering successful knee post from highball ride
35:33 – 38:36
Countering when opponent successfully turtles
38:36 – 45:04
Volume 4
CHAPTER TITLE
START TIME
Introduction to escaping the under-hook side – upper body
0:00 – 2:25
Using far wrist to recover head positioning
2:25 – 11:15
Recovering head position when you loose the far wrist
11:15 – 20:31
Using a butterfly hook to reclaim head position
20:31 – 30:09
Recapturing the back via kimura
30:09 – 35:25
Understanding the value of cross body ride
35:25 – 39:53
Reclaiming the back from Cross body ride
39:53 – 48:33
Freestyle Guillotine from cross body ride
48:33 – 56:13
Hammerlock from cross body ride
56:13 – 1:01:01
Attacking the legs from a cross body ride
1:01:01 – 1:05:56
Volume 5
CHAPTER TITLE
START TIME
Explains offensive and defensive elbow pummeling
0:00 – 2:48
Extraction and reinsertion method to counter elbow pummel
2:48 – 5:45
Using a cross wrist to counter elbow pummels
5:45 – 8:58
What to do when opponent forces two strangle hands
8:58 – 12:29
Explaining the hip height problem/ theory of neck pummeling
12:29 – 18:07
Introduction to finishing from the back
18:07 – 21:37
Recapping under hook vs over-hook side
21:37 – 25:32
Straight wrist grips vs cross wrist grips
25:32 – 26:58
The dilemma between trapping the hands and attacking the neck
26:58 – 30:39
The inherent flaw of one on one grips
30:39 – 33:52
Proper head positioning while strangling
33:52 – 36:18
Multidirectional grip breaking
36:18 – 43:00
Ten finger grip break
43:00 – 45:34
How to properly lock a strangle
45:34 – 51:01
Using a finger walk to counter secondary hand interference
51:01 – 56:50
Countering secondary hand thumb line grab
56:50 – 1:00:53
Countering partners primary hand grab
1:00:53 – 1:03:36
Eliminating partners primary hand via leg trap
1:03:36 – 1:09:06
Two ways of trapping hands
1:09:06 – 1:13:37
Volume 6
CHAPTER TITLE
START TIME
Intro to attacking from the under-hook side
0:00 – 2:21
Using a single cross wrist grip to trap a hand
2:21 – 7:34
Single cross double cross dilemma
7:34 – 10:40
Strangle/double cross trilema
10:40 – 13:56
Using a inside wrist grip to trap a arm
13:56 – 16:49
Using a inside wrist grip to switch to a cross grip
16:49 – 19:44
Countering the secondary defensive hand with a opportunistic trap
Gordon Ryan won an ADCC title by way of guillotine and he is here to show you the guillotine like never before. Start understanding this famous choke as more than a submission but as a position from the greatest no gi grappler ever
The guillotine may be the most accessible and high percentage submission in no gi – And it is much more than a submission
Learn how to use the guillotine to sweep, submit, pass, pin and MORE
Until Now This System Was Only For Gordon and his team but Gordon is going to share every single detail throughout 8 volumes and include rolling commentary where he goes over his EXACT train of thought
Gordon is not only the greatest no gi grappler but a master of articulation – he breaks techniques down in an EASY to implement way
Know more win more
Volume 1
CHAPTER TITLE
START TIME
Intro
0:00 – 1:15
Overview
1:15 – 2:20
Chin To Chest
2:20 – 4:19
Defensive Hand Positions
4:19 – 7:07
Gripping
7:07 – 11:30
Hip To Hip Connection
11:30 – 13:12
Types Of Guillotines
13:12
What To Use And When
16:47 – (20:55)
Volume 2
CHAPTER TITLE
START TIME
Intro To Guillotine From Closed Guard
0:00 – 2:10
Failed Hip Bump To Guillotine
2:10 – 5:48
Finishing Low Elbow
5:48 – 10:02
Finishing High Elbow
10:02 – 15:22
Finishing High Wrist
15:22 – 19:17
Finishing Power Guillotine
19:17 – 21:10
Finishing Figure 4 Guillotine
21:10 – 22:24
Finishing Arm In Guillotine
22:24 – 26:15
Follow To Mount
26:15 – 31:44
Failed Guillotines To Triangle
31:44 – 34:30
Failed Guillotines/Pummeling Legs Inside
34:30
Sumi Gaeshi
38:25 – (42:04)
Volume 3
CHAPTER TITLE
START TIME
Intro To Guillotine From Open Guard Bottom
0:00 – 1:28
Shoulder And Hip Rule
1:28 – 3:07
Footballing The Head
3:07 – 5:16
Sumi Gaeshi To Guillotine
5:16 – 7:00
Cross Shin/Closed Guard/Half Guard Scenarios
7:00 – 12:57
Following Defensive Roll
12:57 – 16:15
Following Defensive Rolls Vs Lower Body Disconnection
Now is your chance to unlock the secrets to heel hook success, as Gordon “The King” Ryan shows you how anyone can become a leg locker with these systems and techniques he has been using through his unparalleled rise in submission grappling
Gordon “The King” Ryan Reveals The Leg Locking Secrets That He Broke Onto The Scene And Continues To Dominate With, As He Teaches You How Anyone Can Systematically Attack The Lower Body In This 8-Volume Masterclass
Learn how to attack and defend in leg entanglements like irimi ashi garami, cross ashi, 50/50, outside ashi, and more!
In each position, Gordon breaks down exactly what you need to do, step-by-step, for success in staying safe as you apply seriously powerful submission holds
Understand the best ways to apply and break with inside and outside heel hooks, and why you must have both to become a complete leg locker
See actual rolling footage from the gym as Gordon puts this system into action and then breaks down exactly what he was doing so you can see the techniques in motion
Know more. Win more.
Volume 1
CHAPTER TITLE
START TIME
Intro To Leg Locks
0:00 – 3:41
Overview
3:41 – 6:41
Theory
6:41 – 8:37
Importance Of Inside And Outside Heelhooks
8:37 – 11:25
Battle Of Inside Positions
11:25 – 15:05
Irimi And Outside Ashi Garami Strategy
15:05 – 19:32
Cross And Inside Ashi Garami Strategy
19:32 – 24:20
50/50 Strategy
24:20 – 27:54
Mutual Ashi Garami Strategy
27:54 – 29:53
General Escape Directions
29:53 – 34:39
Double Trouble
34:39 – 37:32
Following A Leg
37:32 – 39:24
Switching Legs
39:24 – 41:22
Basic Drills
41:22 – 50:58
Achilles Lock Drill
50:58 – 54:50
Cowboy Drill
54:50 – 58:07
Achilles Lock Concepts
58:07 – 1:02:37
Knee Bar Concepts
1:02:37 – 1:07:34
Toe Hold Concepts
1:07:34 – 1:11:17
Heel Hook Concepts
1:11:17 +
Volume 2
CHAPTER TITLE
START TIME
Intro To Irimi Ashi Garami
0:00 – 1:53
Setting An Irimi Ashi Garami
1:53 – 5:21
Stress Test
5:21 – 10:28
Basic Achilles Lock
10:28 – 14:18
Countering A Basic Extraction
14:18 – 16:48
Countering Forward Pressure With Ashi Garami And Elbow Position
16:48 – 19:18
Countering Forward Pressure With Post Ashi
19:18 – 22:05
Countering Forward Pressure With Belly Down Achilles
22:05 – 25:27
Switching To Butterfly Ashi
25:27 – 29:36
Butterfly Ashi To Other Leg Entanglements
29:36 – 34:49
Achilles Heel Hook Dillemma
34:49 – 38:22
Finishing Mechanics
38:22 – 45:32
Stress Test
45:32 – 46:54
Countering A Heel Slip With High Hands
46:54 – 48:28
Countering A Heel Slip With A Roll Through
48:28 – 52:34
Switching To Outside Ashi
52:34 – 54:34
Single Roll Theory
54:34 – 59:41
Countering A Post Knee
59:41 – 1:02:22
Figure 4 Switch If They Refuse To Roll
1:02:22 – 1:05:13
Breaking Mechanics
1:05:13 – 1:07:52
Outside Ashi Breaking Mechanics
1:07:52 +
Volume 3
CHAPTER TITLE
START TIME
Intro To Outside Ashi
0:00 – 0:56
Irimi Ashi Garami Vs Outside Ashi Garami
0:56 – 5:04
Countering A High Leg
5:04 – 8:07
Countering A High Leg With Wrist To Wrist Toe Hold
8:07 – 10:28
Controlling Outside Ashi And Denying Back Exposure
Develop Unstoppable Guard Retention and An Unpassable Guard Under The Expert Guidance Of Legendary Coach John Danaher!
John Danaher is widely regarded as one of the top minds in Jiu-Jitsu, having both top-tier competitive students and a complete anthology of masterclass instructionals that have revolutionized the sport.
Understand the nature and problems of guard retention, and build general physical skills in order to achieve your guard retention goals.
Learn 12 essential body movements essential for guard retention that you can practice with a partner or entirely solo!
Develop a new perspective to all aspects of guard retention including proper frames, generating leverage, overcoming underhooks, creating space, among other game-changing concepts.
Apply different styles of guard retention against today’s most used passing strategies including Toreandos, body locks, knee cuts, scoop grips passing, and MORE!
Dismantle half guard passing with a collection of powerful techniques that are easy to learn and designed to defeat today’s modern half guard passing systems.
Control the action over time and steer events in your favor with guard retention strategies that conserve energy and put you back in control!
Master one of the most crucial aspects to improving your Jiu-Jitsu, Guard Retention, and develop an unpassable guard with John Danaher and his 8-part must-have instructional!
Volume 01
CHAPTER TITLE
START TIME
Introduction
0:00 – 2:56
12 Essential Body Movements for Guard Retention
2:56 +
Volume 02
CHAPTER TITLE
START TIME
Understanding HOW An Opponent Passes Your Guard is the Key to Stop it From Happening – The 5 Steps of Guard Passing
0:00 – 11:50
The 3 Most Important Danger Zones of Guard Passing
11:50 – 16:25
Stance and Posture for Guard retention
16:25 – 23:40
The 3 Most Important Guard Passing Methodologies That You’ll Be Working Against
23:40 – 27:15
Getting a Solid Start to Guard Retention With a Strong Stance and a Simple Game Plan
27:15 +
Volume 03
CHAPTER TITLE
START TIME
Guard Retention Against Distance Passing/Toreando
0:00 – 8:28
High Leg Retention Method
8:28 – 15:07
Inside Leg Retention Method
15:07 – 19:07
Inside Foot or Knee Guard Retention Method
19:07 – 36:32
Outside Shoulder Roll Guard Retention Method
36:32 – 41:59
Elbow Prop Method
41:59 – 45:47
Turning Away From the Pass
45:47 +
Volume 04
CHAPTER TITLE
START TIME
Countering Head Control – Elbow Post
0:00 – 4:22
Inside Position Leg Scissor
4:22 – 9:18
Guard Retention Vs North/South Toreando Passing – Leg Frames to Prevent North/South Transition
9:18 – 17:06
Situp Recovery
17:06 – 22:00
Framing From North/South
22:00 +
Volume 05
CHAPTER TITLE
START TIME
Guard Retention Vs Hips Centered Passing – Negating Body Lock Guard Passing
0:00 – 21:20
The 3 Great Safety Positions Against a Body Lock
21:20 – 27:48
Late Defense Against Body Lock Passes – Chin Post and Shrimp
27:48 – 33:55
Outside Shoulder Roll
33:55 – 40:05
The Hip Slip
40:05 +
Volume 06
CHAPTER TITLE
START TIME
Defending Against Double Scoop Grips – Working Against Locked Hands
0:00 – 2:23
Working Against Unlocked Hands
2:23 – 4:05
Leg Pommeling Vs Double Scoops
4:05 – 7:02
Wrist Control Vs Double Scoops
7:02 – 9:31
Guard Retention Vs Knee Cut – Knee Prop/Shield Method
9:31 – 17:32
Elbow Prop Vs Knee Cut
17:32 – 20:59
Knee Shield to Outdside Shoulder Roll
20:59 +
Volume 07
CHAPTER TITLE
START TIME
Guard Retention Vs Head and Shoulder Control – Stopping Half Guard Passes – Top Head and Arm – Inside Knee/Elbow Escape
0:00 – 9:07
Outside Knee Shield Method
9:07 – 15:39
Knee Lever Guard Retention
15:39 – 20:51
Half Butterfly Retention Method
20:51 – 27:21
Guard Retention Against a Near Side Underhook
27:21 – 35:34
Guard Retention Against Double Underhooks
35:34 +
Volume 08
CHAPTER TITLE
START TIME
Sit-Out Half Guard Variations – Guard Retention Against Sit-Out Crossface
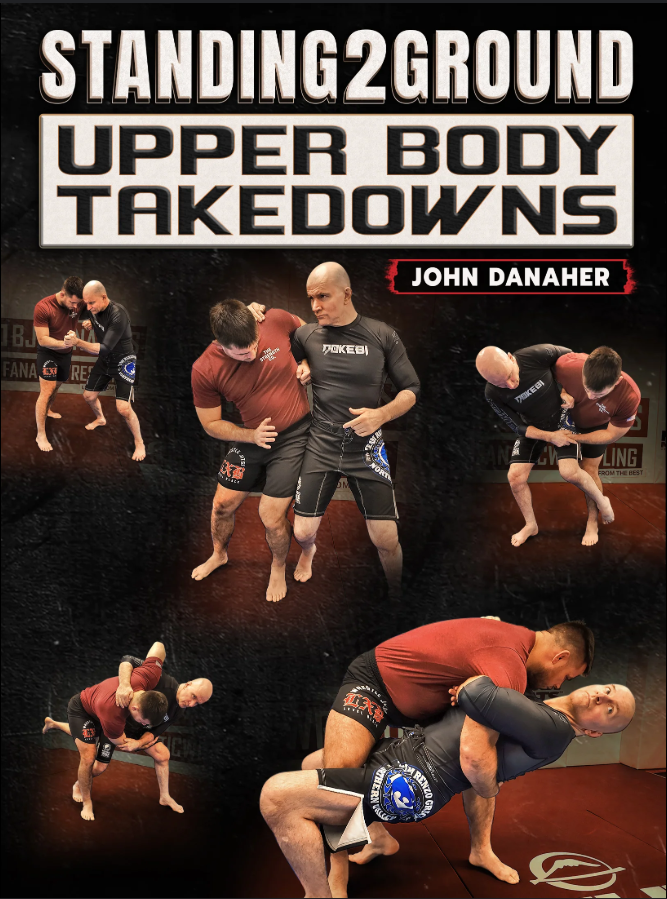
See why upper body takedowns offer unique advantages in submission grappling, and the highest percentage techniques for success in taking down talented opposition
Join Professor Danaher for special studies into some of his preferred upper body techniques, including the cow catcher, uki waza, sumi gaeshi, and more
Work with some of the best takedowns from control positions like underhooks, overhooks, pinch headlocks, and more
John Danaher is one of the world’s greatest grappling coaches, with championship students like Gordon Ryan, Georges St. Pierre, Garry Tonon, and more learning these systems from him at Team New Wave
Professor Danaher goes through specific takedowns that benefit older, less athletic grapplers so that any level of student can benefit from this instruction
Know more. Win more.
Volume 1
CHAPTER TITLE
START TIME
Introduction
0:00 – 4:30
Upper Body Takedown Concepts – The Central Problem of Takedowns in Jiu Jitsu
4:30 – 14:52
Advantages of Upper body Takedowns
14:52 – 19:32
Disadvantages of Upper Body Takedowns
19:32 – 25:44
Minimum Athletic Requirements to Perform the Moves in This Video
25:44 – 31:16
Entering Into Upper Body Grips: The 3 Main Methods – The Legs as a Gateway to the Upper Body
31:16 – 33:39
Defending a Shot
33:39 – 35:22
Upper Body Grip Fighting
35:22 – 40:56
The First Great Training Method to Develop Upper Body Skills: Pummelling
40:56 – 50:49
The Second Great Training Method to Develop Upper Body Skills: Hip Jousting
50:49 +
Volume 2
CHAPTER TITLE
START TIME
Special Study: The Cow Catcher – Mechanics
0:00 – 13:01
Two Approaches to the Cow Catcher: One Chin Strap First Two Tight Waist First
13:01 – 18:20
Go Behind Setups to the Cow Catcher
18:20 – 24:19
Reactions Based Off Elbow Position
24:19 – 26:57
The Perfect Compliment to the Cow Catcher: The Roll Through
26:57 – 33:47
Opponent’s 2nd Line of Defense to Cow Catcher: Standing Up – Yoko Sumi Gaeshi
33:47 – 41:53
Ouchi Gari
41:53 – 48:04
A Great Setup For the Cow Catcher: Stopping a Shot
48:04 – 55:26
An Alternative Way of Entering the Cow Catcher: Waist First Chin Strap Second
55:26 – 1:03:08
Driilling Scene Featuring Placido Santos
1:03:08 +
Volume 3
CHAPTER TITLE
START TIME
Special Study: Uki Waza – Arm Drag and Hip Variation
0:00 – 11:40
Special Note on Arm Drag and Hip Variation
11:40 – 14:28
2 on 1 Opponent Headlocks
14:28 – 18:27
Front Headlock Uki Waza
18:27 – 22:32
Overhook Uki Waza: The Lateral Drop
22:32 – 34:11
My Favorite Setup Overhook Uke Waza (Lateral Drop)
34:11 – 37:03
2 on 1 Uke Waza For the Strongest Lateral Drop
37:03 +
Volume 4
CHAPTER TITLE
START TIME
Special Study: Sumi Gaeshi – Whizzer and Wrist Vs Single Leg
0:00 – 10:40
Lat and Wrist Vs Single Leg
10:40 – 15:07
Chest Wrap Sumi Gaeshi Vs Double Leg
15:07 – 21:05
Butterfly Sumi Gaeshi Vs Double Leg
21:05 – 25:17
Sumi Gaeshi Vs High Crotch
25:17 – 29:27
Yoko Sumi Gaeshi on the Mat
29:27 – 34:12
2 on 1 Yoko Sumi Gaeshi
34:12 – 39:03
Arm Drag Sumi Gaeshi
39:03 – 44:09
Special Study: Ude Gaeshi – Mechanics
44:09 – 50:28
Application
50:28 – 54:38
Setups
54:38 – 59:16
Mistakes To Avoid
59:16 +
Volume 5
CHAPTER TITLE
START TIME
Throwing From the Overhook – Uki Goshi (Half Hip Throw)
0:00 – 6:17
Tai Otoshi
6:17 – 9:21
One Handed Tai Otoshi
9:21 – 11:57:00
Uchi Mata
11:57:00 – 22:01:00
Harai Goshi
22:01:00 – 25:48:00
Uki Waza
25:48:00 – 30:23:00
Kosoto Gake
30:23:00 – 36:25
Throwing from the Over/Under Tie Up – Uke Goshi (Half Hip Throw)
If you talked to the one hundred most knowledgeable grapplers in the world and asked them, “Who would you most like to learn grappling from?” ninety-eight, ninety-nine, or maybe even all one hundred of them would give you the same answer: John Danaher. There is just no equal.
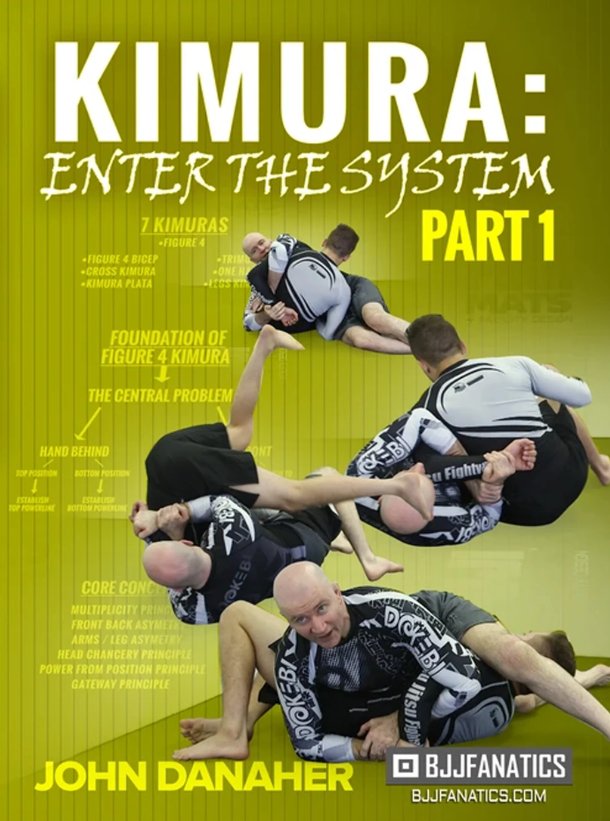
“The Kimura System” from John Danaher: The Most Sought After Grappling Instructor On The Planet
John helped coach Georges St Pierre and Chris Weidman to UFC World Titles. Garry Tonon has become a 3x ADCC competitor and a grappling Icon
John has guided guys like Eddie Cummings and Gordon Ryan to stardom in a fraction of the time that it would take ordinary people
The Kimura system John teaches is excellent for both Gi and No Gi and applicable for Self-Defense
This system will change your perspective on Jiu Jitsu
Kimura Everyone
Volume 1
CHAPTER TITLE
START TIME
System Overview
0:00 – 15:48
Trinity of Power
15:48 – 21:15
Thumb or no Thumb
21:15 – 26:19
Essential Nature of Kimura – A Twisting Lock
26:19 – 30:23
Hand and Arm Positioning
30:23 – 37:47
Bending A Straightened Arm
37:47 – 43:21
Diagonol Power Line
43:21 – 49:30
Pull Dominant Kimuras vs Push Dominant Kimuras
49:30 – 52:11
Beating The Shoulder and Trapping Head
52:11 – 56:35
Shoulder Line
56:35 – 59:51
A Vexing Problem
56:35 – 1:04:07
Essential Skill of Kimura System – Roll Through Kimura Scrambles
1:04:07 – 1:11:54
Volume 2
CHAPTER TITLE
START TIME
Introduction to Dorsal Kimura
0:00 – 7:53
Unlocking Reinforced Hands
7:53 – 17:45
Using Legs For Kimura
17:45 – 34:04
Switching to Alternative Submission
34:04 – 39:18
Switching to Different Position / System
39:18 – 48:56
Volume 3
CHAPTER TITLE
START TIME
Introduction to T Kimura
0:00 – 10:58
Top and Bottom Knee
10:58 – 14:15
Bottom Knee to Back
14:15 – 17:41
Bottom Knee to Rear Triangle
17:41 – 20:01
Bottom Knee to Arm Bar
20:01 – 22:10
Bottom Knee to Side Triangle
22:10 – 24:22
Bottom Knee Penetration to Russian Arm
24:22 – 29:44
Bottom Knee into Cross Ashi Garami
29:44 – 32:50
Bottom Knee Losing Russian Arm
32:50 – 38:49
Top Knee Attacks
38:49 – 46:05
Relationship Between Kimura and Bicep Slicer
46:05 – 54:03
Volume 4
CHAPTER TITLE
START TIME
Introduction to Applications
0:00 – 3:43
Side Kimura Applications
3:43 – 13:19
Side Kimura Switching Elbows
13:19 – 17:13
Side Kimura Supinated Grip
17:13 – 21:03
Side Kimura Pronated Grip
21:03 – 26:13
Half Guard Top
26:13 – 34:09
Half Guard to T Kimura
34:09 – 39:12
Half Guard Attacking Power Prop
39:12 – 44:11
Classroom Commentary #1
44:11 – 45:57
Classroom Commentary #2
45:57 – 49:46
Classroom Commentary #3
49:46 – 52:38
Volume 5
CHAPTER TITLE
START TIME
Butterfly Guard
0:00 – 4:27
kimura vs Butterfly Guard Moving Head to Setup Kimura
4:27 – 7:50
Kimura vs Butterfly Guard Standing
7:50 – 11:24
Kimura vs Butterfly Guard Standing Opposite Side
11:24 – 16:06
Kimura vs Butterfly Guard Working From Outside Position
16:06 – 19:34
Kimura’s Kimura
19:34 – 31:53
Turtle Position Olympic Bar to Kimura
31:53 – 35:39
Kimura vs Turtle Side Triangle
35:39 – 39:26
Kimura vs Single Leg on Mat
39:26 – 47:58
Kimura vs Single Leg on Mat Drill
47:58 – 55:45
Classroom Commentary #4
55:45 – 59:28
Classroom Commentary #5
59:28 – 1:02:43
Volume 6
CHAPTER TITLE
START TIME
Kimura vs Single Leg Countering the Peak Out
0:00 – 4:59
Kesa-Gatame
4:59 – 14:43
Closed Guard Kimura – The Great Mystery of Closed Guard Kimura
14:43 – 38:15
Kimura Closed Guard Wrist Control and Power Prop
38:15 – 46:20
Closed Guard Kimura Head Pass Setup
46:20 – 51:46
Kimura From Bottom Half Guard
51:46 – 1:02:05
Bottom Half Guard Kimura Converting to Full Guard
1:02:05 – 1:05:46
Half Guard Kimura Sumi Gaeshi Variations
1:05:46 – 1:09:08
Classroom Commentary #6
1:09:08 – 1:11:06
Classroom Commentary #7
1:11:06 – 1:12:39
Volume 7
CHAPTER TITLE
START TIME
Bottom Half Guard To T Kimura
0:00 – 6:21
Half Guard Kimura Vs Arm Bar
6:21 – 14:44
Half Guard Kimura To Front Triangle
14:44 – 24:44
Kimura Bottom Turtle Position
24:44 – 31:32
Kimura Bottom Turtle Inside Arm Roll Staying Above the Hips
31:32 – 37:54
Kimura Bottom Turtle Inside Arm Roll to Kimura Finish
John Danaher is considered by many, the most brilliant mind in the history of BJJ, in this new revolutionary series, he has constructed an entire 8 volume course focusing solely on one position, the arm drag – The intricacies and details are unmatched
This is your opportunity to master one of the most popular positions in all of grappling from the greatest bjj coach on the planet
John is going to breakdown the arm drag from half butterfly, supine, seated, standing, defensively and more
This is the most in depth course ever created on a single position – Understand mechanics, concepts, application and execution like never before
Know more Win more.
Volume 1
CHAPTER TITLE
START TIME
Introduction
0:00 – 3:10
3 Considerations for Effective Arm Dragging
3:10 – 29:30
The 10 Major Themes of This Video
29:30 – 34:00
1. Learn the Classic Methods Of Arm Drags But Also Learn Effective Followups
34:00 – 37:05
2. Use Lower Body Connection for Better Results
37:05 – 39:34
3. Dragging the Opposite Arm of Your Half Butterfly Connection
39:34 – 43:40
4. Hands and Elbows on the Floor are the Highest Percentage Arm Drags
43:40 – 47:09
5. The Importance of Open Stance Arm Drags In Standing Position
47:09 – 50:06
6. Attacking the Far Arm From Open Stance
50:06 – 52:20
7. Ashi Waza Arm Drags
52:20 – 54:26
8. Attack on Both Side For Best results
54:26 – 56:18
9. The Power of Head Inside Arm Drags
56:18
10. Understanding Wrist Control
58:06 – (1:03:52)
Volume 2
CHAPTER TITLE
START TIME
Arm Drags from Seated Position Against an Opponent on 2 Knees – The Rising Arm Drag
0:00 – 5:49
Rising Arm Drag Part 2
5:49 – 9:01
Falling Arm Drag
9:01 – 13:36
Kuzushi Arm Drag
13:36 – 16:23
Kuzushi Arm Drag Part 2
16:23 – 19:28
Elevator Drag
19:28 – 24:08
Reacting to Counters – Opponent Fights Grips – Switch Sides
24:08 – 28:03
Opponent Pulls Away – Double Leg
28:03 – 31:09
Opponent Spins Away – Snapdown
31:09 – 33:13
Opponent Posts Leg – Overhead Sweep
33:13 – 36:49
Opponent Posts Leg – Cross Ashi Garami
36:49
Arm Drag Into Sumi Gaeshi or Heel Hooks
38:56 – (43:54)
Volume 3
CHAPTER TITLE
START TIME
Arm Drags From Supine Guards – Arm Drag From Supine Butterfly/Forward Shift
0:00 – 4:25
Arm Drag From Reverse De La Riva
4:25 – 7:27
Arm Drag From Half Guard
7:27 – 12:04
Arm Drags From Seated Guard Against a Standing Opponent – Arm Drag to Back
12:04 – 19:14
Arm Drag to Sliding Drag
19:14 – 22:53
Arm Drag to Low Double Leg
22:53 – 25:08
Arm Drag to Lock Double Leg
25:08 – 27:53
Arm Drag to Double Kouchi Gari
27:53
Arm Drag to Double Kouchi to Ankle Pick
31:48 – (33:59)
Volume 4
CHAPTER TITLE
START TIME
Arm Drags From Half Butterfly Guard
0:00 – 10:34
Dealing With the Problem of High Hands
10:34 – 15:30
Half Butterfly Arm Drag to Overhead Sweep
15:30 – 18:02
Half Butterfly Arm Drag to Shoulder Crunch
18:02
Half Butterfly Arm Drag Into Underhook Offense
22:00 – (28:20)
Volume 5
CHAPTER TITLE
START TIME
Defensive Arm Drags – The Crucial Double Pits Position
0:00 – 4:18
Arm Drag From Double Pits
4:18 – 12:06
Arm Drag From Front Headlock
12:06 – 16:29
Defensive Arm Drag Vs Wrestle Up
16:29 – 20:40
Defensive Arm Drags From Standing Position
20:40
Defensive Arm Drags From Front Headlock
24:15 – (29:07)
Volume 6
CHAPTER TITLE
START TIME
Standing Arm Drags – Foundational Methods – Wrist Control Outside Step
0:00 – 2:13
Sliding Arm Drag
2:13 – 5:46
Arm Drag to Double Leg
5:46 – 8:31
Arm Drag Kouchi Makikomi
8:31 – 11:12
Advanced Standing Arm Drags – Ashi Waza Arm Drags – Sasae Arm Drag (Closed Stance)
11:12 – 15:14
Far Leg Block (Open Stance)
15:14 – 18:39
Hands to Floor Arm Drags – Snaps to Drags
18:39 – 23:31
Ear to Ear Arm Drags – Wrist Control Underhook Chest to Chest
23:31
Ear to Ear Inside Tie Fake Shot
26:23 – (29:46)
Volume 7
CHAPTER TITLE
START TIME
Open Stance (Kenka Yotsu) Arm Drags – Inside Tie
0:00 – 9:57
Inside Wrist Arm Drag
9:57 – 13:21
Arm Drag From 2 on 1
13:21 – 17:32
Underhook Far Side Arm Drag
17:32 – 22:38
Far Arm Drags
22:38 – 26:55
Head Outside Arm Drag
26:55 – 30:07
Head Inside Arm Drag
30:07
Head Inside Arm Drag to Single Leg
37:41 – (39:47)
Volume 8
CHAPTER TITLE
START TIME
Knee Drop Arm Drags – Double Knee Drop
0:00 – 4:08
Single Knee Drop
4:08 – 9:51
Attacking Both Sides With Arm Drags – Inside Tie and Wrist
The Most Sought After Grappling Coach On Earth – Professor John Danaher – Shows His Unique 3-Direction System For The New Wave Half Guard, Including The Sweeping, Leg Locking, And Retention Secrets That His Students Have Used To Dominate Elite Competition
Learn conceptually why the no-gi half guard is one of the favorites of John’s squad of athletes, including the MMA practicality.
This 8-volume series covers the 3 directions of attack, how to combine them, and which is the strongest of the 3 for your offensive focus.
See how to maintain the half guard against heavy pressure and get back on offense using simple and achievable mechanics.
Professor John Danaher has taught grappling and combat superstars like Gordon Ryan, Georges St. Pierre, Garry Tonon, and many more throughout his illustrious coaching career – with remarkable success with students of all levels of experience and athleticism.
Combine tight waists, single legs, body locks, knee shields, deep half, scorpions, knee levers, and more into one comprehensive and focused system for half guard mastery.
Volume 1
CHAPTER TITLE
START TIME
Introduction
0:00 – 6:39
Understanding New Wave Guard Play: 3 Key Insights
6:39 – 35:54
The 3 Reasons Why You Must Have a Strong Half Guard – Half guard is an excellent means of direct attack – From Bottom Position That Confers Some Advantages Over Conventional Guards
35:54 – 37:38
Half Guard Offers the Possiblity of Greater Connection So You Can Impose Bottom Position
37:38 – 41:51
Half Guard Allows Stronger Kuzushi Potential Because You Are Underneath Your Opponent’s Center of Gravity
41:51 – 44:46
Half Guard is a True 3 Directional Guard
44:46 – 48:58
Half Guard is Halfway to Your Opponent’s Back and Halfway to a Takedown
48:58 – 51:24
Half Guard is Well Adapted to a Transition to Mixed Martial Arts
51:24 – 54:31
Half Guard is Closely Related to the Skill of Pin Escapes
54:31 – 57:48
Half Guard Addresses the Fundamental Reality of Guard Play
57:48 – 1:01:32
Understanding Half Guard Position: The Fundamental Paradox of Half Guard
1:01:32 – 1:03:25
Resolving the Paradox: The Law of Outside Shoulder and Hip
1:03:25 +
Volume 2
CHAPTER TITLE
START TIME
The Path to Heaven: Making Half Guard Work for You – Knee Shield
0:00 – 6:37
Half Elbow Escape
6:37 – 12:44
Arm Frames
12:44 – 23:24
Kuzushi (Off Balancing) From Half Guard
23:24 – 26:10
Half Scissor Kuzushi
26:10 – 28:18
Half Butterfly Bump Kuzushi
28:18 – 30:13
Scoop Half Kuzushi
30:13 – 35:31
Scorpion Elevator Kuzushi
35:31 – 40:02
Half Butterfly Elevator Kuzushi
40:02 – 43:02
Knee Lever Kuzushi
43:02 – 46:33
Tight Waist Tilt Kuzushi
46:33 – 48:48
Windmill Kuzushi
48:48 +
Volume 3
CHAPTER TITLE
START TIME
Tight Waist Series – Getting to the Position
0:00 – 4:53
The Lower Leg Shift
4:53 – 11:05
The Tight Waist Roll Through
11:05 – 21:27
Ankle Pick
21:27 – 25:43
Pass Off Ankle Pick
25:43 – 29:16
Duck Under
29:16 – 34:28
Half Guard Body Lock – Body Lock Suck Back
34:28 – 41:00
Coming Up To Your Feet With a Body Lock
41:00 – 1:00:04
Outside Knee Pick
1:00:04 – 1:04:02
Inside Scoop Sweep (Navy)
1:04:02 – 1:11:21
Limp Arm
1:11:21 – 1:20:41
Cross Body Ride
1:20:41 – 1:28:40
Kosoto Circle
1:28:40 +
Volume 4
CHAPTER TITLE
START TIME
Tight Waist VS Whizzer Series – Understanding the Whizzer
0:00 – 13:53
The Circle Body Lock
13:53 – 16:38
Uki Goshi
16:38 – 19:01
Far Side Walk
19:01 – 23:02
Half Nelson Pin
23:02 – 26:20
Outside Scoop
26:20 – 29:49
Single Leg Series – The Differences Between Single Leg and Tight Waist
29:49 – 36:37
Understanding a Back Side Single Leg Finish
36:37 – 43:56
Back Side Single Leg From Half Guard
43:56 – 49:03
Back Side Single Leg Limp Arm
49:03 – 51:53
Forward Heist Mechanics
51:53 – 1:00:06
Front Side Single Leg Finishes From Half Guard
1:00:06 – 1:12:11
Half Guard Single Leg Coming Up To Your Feet
1:12:11 – 1:20:35
Hiza Gatame Series
1:20:35 – 1:39:24
The Rolling Hiza Gatame
1:39:24 – 1:42:20
Lower Leg Shift and Hiza Gatame
1:42:20 +
Volume 5
CHAPTER TITLE
START TIME
The Knee Lever Series – Mechanics
0:00 – 4:23
Knee Lever: Head Position
4:23 – 8:23
2 on 1 Wrist Knee Lever
8:23 – 12:20
Knee Lever 1 on 1 Grips
12:20 – 15:08
1 on 1 Scoop
15:08 – 17:39
The Knee Lever Creates Scrambles That You Always Win
17:39 – 23:28
Knee Lever with a Lat Post
23:28 – 30:16
Putting Your Opponent’s Knee on the Mat
30:16 – 33:18
Elbow Lever
33:18 – 36:08
Forward Heist to Single Leg From Failed Knee Lever
36:08 – 41:12
Arm Drag From Failed Knee Lever
41:12 – 44:29
2 on 1 Elbow Post Knee Lever to the Back
44:29 – 49:36
Overhook Knee Levers – Overhook Sweep
49:36 – 55:55
Knee Lever as Entry to Tight Waist
55:55 – 1:00:53
Knee Lever to Butterfly Hook
1:00:53 +
Volume 6
CHAPTER TITLE
START TIME
The Elbow Escape Series – Mechanics of Elbow Escape
0:00 – 16:03
Special Study: Ude Gatame
16:03 – 19:28
Mechanics
19:28 – 31:05
Attacking Both Sides with Ude Gatame
31:05 – 35:59
The Relationship Between Ude Gatame and the Shoulder Crunch Sumi Gaeshi
35:59 – 40:24
Ude Gatame to Triangle
40:24 – 45:43
Ude Gatame Into Kimura
45:43 – 50:34
Ude Gatame to Juji Gatame
50:34 – 58:29
Ude Gatame Combined with Forward Shift
58:29 – 1:08:06
Scoop Scorpion Series
1:08:06 – 1:20:48
Scorpion Leg Pass
1:20:48 – 1:25:25
Scorpion Walk Around
1:25:25 – 1:32:52
Scorpion Hip Heist
1:32:52 +
Volume 7
CHAPTER TITLE
START TIME
Knee Shield Half Guard Entries – The Scoop Elevator
0:00 – 13:25
Different Variations of Attack
13:25 – 18:48
Attacking the Far Leg
18:48 – 23:05
Controlling Movement From the Scoop Grip
23:05 – 29:34
Spinning Around The Leg
29:34 – 40:07
Kani Basami
40:07 – 50:33
Butterfly Insertion
50:33 – 57:20
Ankle Pick Heel Hook Series
57:20 – 59:44
Ankle Pick to Irimi Ashi Garami
59:44 – 1:06:28
Ankle Pick Kani Basami
1:06:28 – 1:13:53
Half Butterfly Guard Series – Outside Elevator
1:13:53 – 1:25:50
Half Butterfly Guard Into Single Leg Cross Ashi Garami
1:25:50 +
Volume 8
CHAPTER TITLE
START TIME
Deep Half Guard Into Leg Locks – Inside Sankaku
0:00 – 7:10
50/50 From Deep Half Guard
7:10 – 12:51
Knee Lever Leg Lock Entries – Knee Lever and Outside Spin (Best Entry For Less Athletic/Older Athletes)
12:51 – 25:50
Knee Lever into Leg Locks from Disadvantageous Positions
25:50 – 36:28
Leg Locks From Half Guard – Why Leg Locks Should be the Centerpiece of Your Half Guard Game
36:28 – 41:30
Countering Half Guard Sit-out Situation – Thumb Post
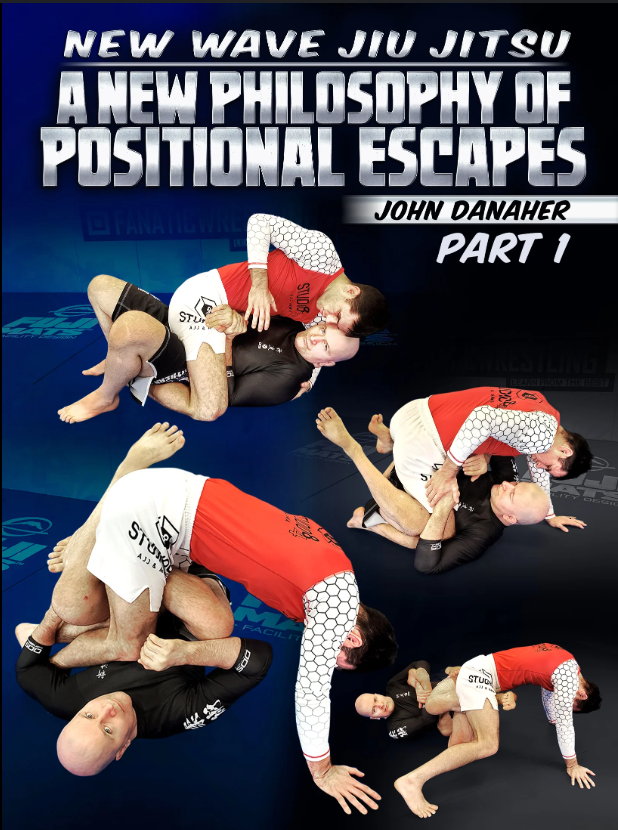
Revolutionize The Way You Escape From Bad Position And Immediately Launch Devastating Submission Attacks With Professor John Danaher’s New Wave Jiu-Jitsu System
Turn escapes immediately into dangerous positions of attack with this counter attack and escape series from Professor John Danaher
Merge position and submission with New Wave Jiu-Jitsu. as Professor Danaher explains how to combine both into the most effective systems possible
Take advantage of the escape and find opportunistic submission holds that John’s students have been excelling with in competition for years
Learn how John separates positions into leg and arm-based pins, and how these key insights can change your escapes forever
John Danaher is the Brazilian Jiu Jitsu coach of champion athletes like Gordon Ryan, Garry Tonon, and Georges St. Pierre
Study submission attacks with detailed step-by-step coaching around leg locks, arm locks, clamp guards, and more that Professor Danaher has perfected
Course Content
Collapse All Sections
Volume 1
CHAPTER TITLE
START TIME
Introduction
0:00 – 8:05
Escape Skills Are The Basis of Your Confidence in Jiu Jitsu
8:05 – 15:59
The Traditional Approach to Escape in Jiu Jitsu
15:59 – 20:47
The 2 Defensive Skills of Jiu Jitsu
20:47 – 22:32
Positional Escapes – What is a Pin?
22:32 – 27:13
Solving the Problem of Pins
27:13 – 33:03
A New Philosophy of Pin Escapes: Satisficing vs Maximizing
33:03 – 42:00
The Principle of Sunk Costs
42:00 – 50:41
The Game Plan for Our New Escape Philosophy
50:41 – 58:57
The 5 Pins of Jiu Jitsu
58:57 +
Volume 2
CHAPTER TITLE
START TIME
Escaping the Mounted Position: Maximizing Philosophy – The Kipping Escape – The Lateral Kipping Escape
0:00 – 25:21
The Misdirectional Kipping Escape
25:21 – 38:34
The Overhead Kipping Escape
38:34 – 55:04
The Elbow Escape – Inside and Outside Variations
55:04 – 1:05:36
Further Reflections on the Outside Elbow Escape
1:05:36 +
Volume 3
CHAPTER TITLE
START TIME
Escaping the Rear Mount Position – The First Battle of Back Escapes: The Hand Fight
0:00 – 12:23
The Second Battle of Back Escapes: The Head Fight
12:23 – 23:16
Back Escapes Part 2
23:16 – 32:42
Escaping The Body Triangle – Body Triangle Preliminaries
32:42 – 39:54
The Theory of the 4 Triangles
39:54 – 49:46
The Fifth Triangle
49:46 – 59:14
The Theory of the Upper Body Connection: The Spinning Escape
59:14 – 1:15:16
The Headlock Escape
1:15:16 +
Volume 4
CHAPTER TITLE
START TIME
Knee on Belly Escapes – Part 1
0:00 – 13:01
Knee on Belly Escapes – Part 2
13:01 – 20:38
Side Pin Escapes – Side Elbow Escape
20:38 – 33:06
Side Elbow Escape Part 2
33:06 – 42:42
The Role of the Head in Side Escapes
42:42 – 48:30
Different Defensive Frame Options
48:30 – 54:45
Frame Options With the Outside Arm
54:45 – 58:17
The Central Problem of Crossface Side Pins: Near Hip/Far Hip Connection
58:17 – 1:03:51
The Central Problem of Reverse Cross Face Side Pins: Near Shoulder/Far Shoulder Connection
1:03:51 – 1:06:59
Understanding Variations in Side Pins
1:06:59 +
Volume 5
CHAPTER TITLE
START TIME
The Role of Kipping in Side Elbow Escapes
0:00 – 4:48
The Role of Reverse Shrimping in Side Elbow Escapes
4:48 – 10:20
Side Elbow Escape: Putting it All Together
10:20 – 15:31
A Special Study: The Clamp
15:31 – 34:23
Side Elbow Escape Into Leg Locks
34:23 – 49:00
The High Leg Escape
49:00 – 1:01:27
The High Leg Escape Part 2
1:01:27 – 1:12:39
The Knee Escape
1:12:39 – 1:23:47
The Knee Escape Part 2
1:23:47 – 1:29:18
The Knee Escape Part 3
1:29:18 +
Volume 6
CHAPTER TITLE
START TIME
Ankle Trap Escape
0:00 – 8:31
Tricep Post Escape
8:31 – 24:08
The Back Door Escape
24:08 – 41:38
Escaping Sit-Out Pins
41:38 – 57:03
Escaping North South Pins – Unique Elements of North/South Pins
57:03 – 1:05:31
The High Leg Escape
1:05:31 – 1:14:16
Variations of North/South Require Variations in Escape
1:14:16 – 1:18:54
Escaping Other Variations of North/South Pins
1:18:54 +
Volume 7
CHAPTER TITLE
START TIME
Escaping Turtle Position – Preliminaries
0:00 – 5:37
Escaping the Tight Waist – Makikomi
5:37 – 15:52
Shoulder Roll
15:52 – 27:25
Escaping Body Locks
27:25 – 35:49
Reach-Back Sumi Gaeshi
35:49 – 40:46
Escaping Seat Belt
40:46 – 51:41
Peek-Out
51:41 – 54:28
General Hand Fighting From Turtle
54:28 +
Volume 8
CHAPTER TITLE
START TIME
Summarizing Our Philosophy and Method of Positional Escape: The 5 Step Method – Defensive Responsibility